Pioneer Rakdos Racrifice-Midrange Guide

A Unbeatable Structure
I am a big enjoyer of the structure Fable / Thoughtseize / Bloodtithe Harvester / Fatal Push in the Pioneer format . When my opening hands consist of these cards, I feel invincible. However, a deck requires 60 cards, and the real challenge lies in optimizing the remaining cards available.
In the last 20 slots, Rakdos Midrange employs average standalone cards that don’t scale (such as Graveyard Trespasser, Bonecrusher Giant, etc.). This means that while Rakdos Midrange is difficult to disrupt, it can sometimes lack power in the later stages of the game. On the other hand, Rakdos Sacrifice utilizes numerous cards that are suboptimal on their own. This can create functionality issues in the early game, but once the later stages are reached and all the synergies are assembled, significant power spikes are guaranteed.
An Age-Old Debate: Raw Power vs Stability
This brings us to the age-old debate between Staying Power and Synergy, and I don’t necessarily have a default preference. I’d rather explore inevitability options in Rakdos Midrange or seek increased stability in Rakdos Sacrifice. Together with my friends Louis Deltour and Antoine Lagarde, we were unable to provide inevitability to Rakdos Midrange, but we discovered ways to enhance the stability of Rakdos Sacrifice. I will often say “I” in this article, but that is really a team effort.
The Decklist

| Creature [16] | ||
|---|---|---|
| 3 Cauldron Familiar | $1.49 | |
| 4 Bloodtithe Harvester | $0.35 | |
| 1 Kroxa, Titan of Death's Hunger | $3.49 | |
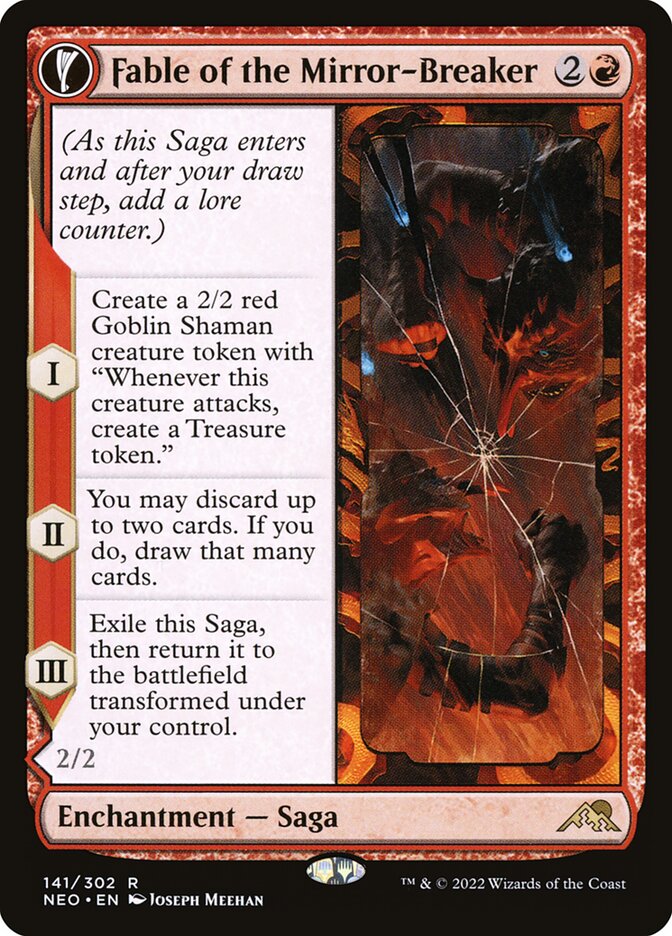
| 4 Fable of the Mirror-Breaker | $21.99 | |
| 4 Mayhem Devil | $0.79 | |
| Artifact [5] | ||
|---|---|---|
| 4 Witch's Oven | $1.49 | |
| 1 Reckoner Bankbuster | $2.29 | |
| Instant [8] | ||
|---|---|---|
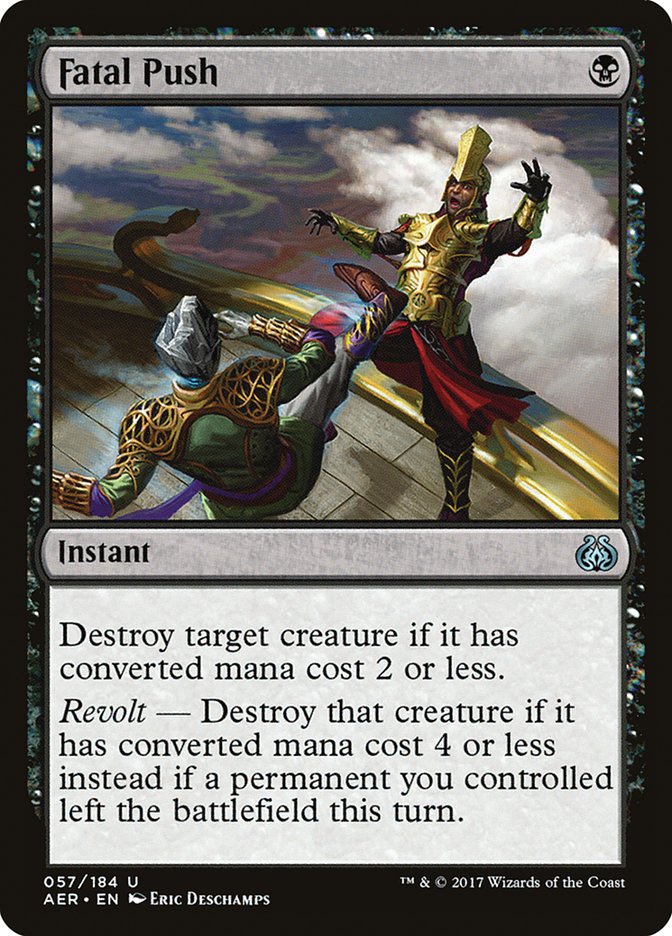
| 4 Fatal Push | $2.49 | |
| 4 Deadly Dispute | $1.49 | |
| Sorcery [7] | ||
|---|---|---|
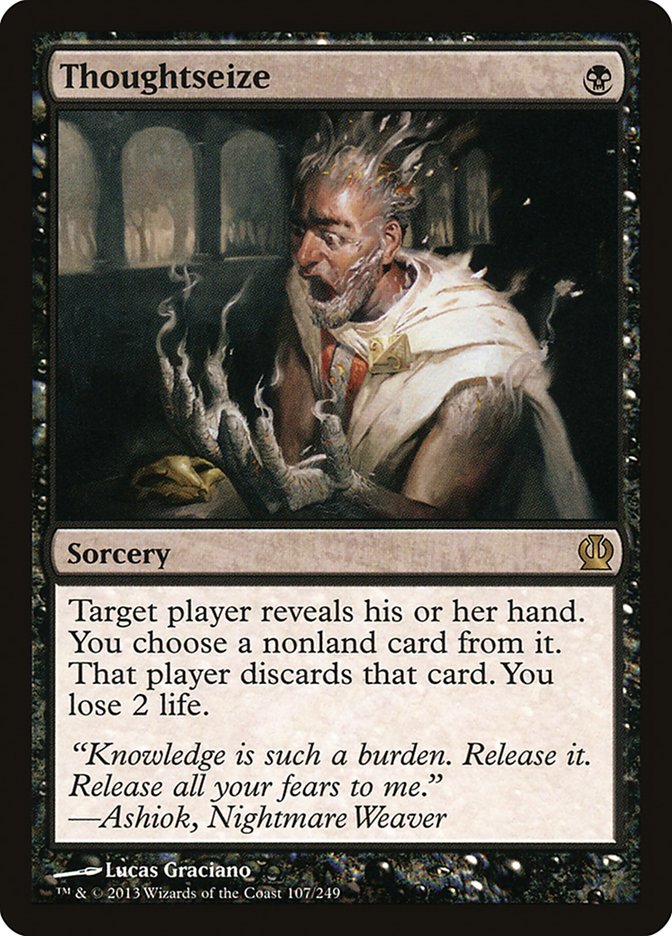
| 4 Thoughtseize | $9.99 | |
| 3 Claim the Firstborn | $0.35 | |
| Land [24] | ||
|---|---|---|
| 3 Blackcleave Cliffs | $2.79 | |
| 4 Blightstep Pathway | // | $6.49 |
| 4 Blood Crypt | $17.99 | |
| 3 Hive of the Eye Tyrant | $4.99 | |
| 2 Mutavault | $11.99 | |
| 1 Ramunap Ruins | $0.35 | |
| 1 Sokenzan, Crucible of Defiance | $6.49 | |
| 2 Sulfurous Springs | $1.79 | |
| 2 Swamp | $0.01 | |
| 1 Takenuma, Abandoned Mire | $12.99 | |
| 1 Urborg, Tomb of Yawgmoth | $39.99 | |
| Sideboard [15] | ||
|---|---|---|
| 1 Duress | $0.35 | |
| 2 Furnace Reins | $0.35 | |
| 2 Abrade | $0.35 | |
| 2 Dreadbore | $0.49 | |
| 3 Go Blank | $0.69 | |
| 2 Ob Nixilis, the Adversary | $6.49 | |
| 1 Damping Sphere | $0.79 | |
| 1 Outpost Siege | $0.49 | |
| 1 Jegantha, the Wellspring | $0.99 | |
 $88.45 Tix @cardhoarder
$2.21 / Week @cardhoarder
$88.45 Tix @cardhoarder
$2.21 / Week @cardhoarder
 $302.42 @tcgplayer
 $394.37 @cardkingdom
Card Choices
A Replacement for Unlucky Witness
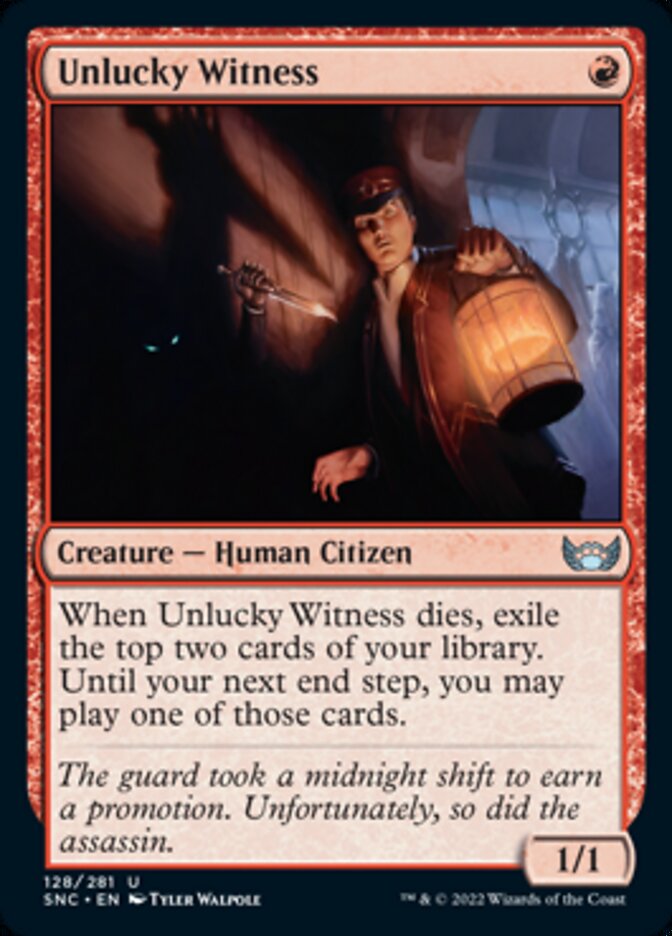
Most Rakdos Sacrifice lists play 22 lands and 2 to 3 Unlucky Witness. These Human Citizens serve as a hybrid between land and spells, ensuring land drops in the early game, finding key cards (and sideboard cards!) in the mid-late game, and fueling synergies. The problem we identified is that you don’t always have the sacrifice outlet or the tempo to cast it. If you have Unlucky Witness, 2 lands, Fable, Bloodtithe Harvester, and a sac outlet, you will have to make a choice or run the risk of missing your 3rd land drop.
Consequently, Unlucky Witness is much stronger when you can “sacrifice” it through combat. This card is far more functional in an aggressively centric metagame than in midrange, combo, and control ones, like the current situation.
We replaced them with a couple of Mutavaults. The immediate advantage is having plain lands instead of Unlucky Witness.

The statistics are as follows:
| With 22 lands | on the play | You have a 71% chance of hitting your 3rd land drop. |
| With 22 lands | on the draw | You have a 79% chance of hitting your 3rd land drop. |
| With 24 lands | on the play | You have a 78% chance of hitting your 3rd land drop. |
| With 24 lands | on the draw | You have an 85% chance of hitting your 3rd land drop. |
This makes a notable difference and reduces the pressure on red sources, which also contributes to improving the power level of the mana base. Hive of the Eye Tyrant is a much better land than Den right now (especially with the return of Phoenix in Pioneer), but if you need a certain number of red sources and a finite number of manlands, you have to make a choice. Here, we can simply maximize the number of Hives.
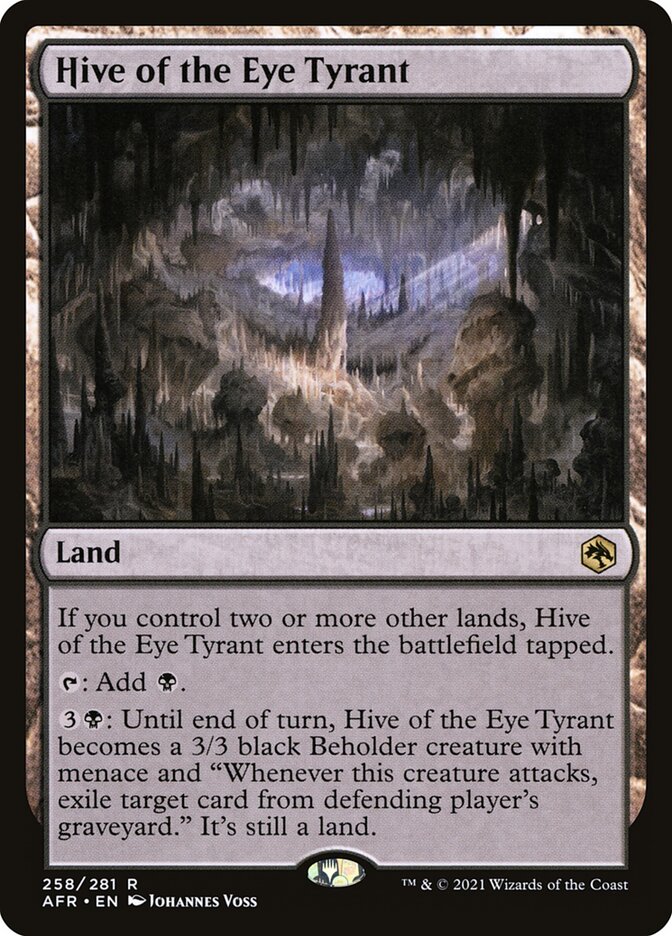
Mutavault is not only a land. It is also a creature, and Rakdos Sacrifice is an archetype that capitalizes well on cheap damage. With Cat/Oven and Devil, there are many games that can be swung by a single life point. Animating Mutavault and attacking essentially deal 2 damage for 2 mana, which can be easily curved in the midgame thanks to the low mana value of our cards.
Treasures Are Better
One treasure makes more than one mana, and makes much more than just mana. When you want the option to cast a card during your opponent’s turn, you “invest” in keeping lands untapped, not using during your own turn. However, the perfect moment to utilize your instant-speed card may not arise. Consequently, you might find yourself in a dilemma: you don’t want to cast the card, but you also don’t want to waste the mana. A decision must be made: do you suboptimize your card or your mana? With treasures, no such compromise is necessary; you keep this mana even if you don’t spend it. Virtually, treasures improves the power level of instant speed cards.
The mana efficiency of Rakdos Sacrifice is so high that Mutavault fits perfectly into the archetype’s game plan
I wanted to underscore the point that the mana efficiency of Rakdos Sacrifice is so high that Mutavault fits perfectly into the archetype’s game plan and mana flow. It's common that all your mana is utilized from the first turn to the very last one, even in exceedingly lengthy games.
Mutavault is not as optimal as Witness to be sacrificed on Deadly Dispute T2 and Ob Nixilis post-sideboard. T2 Deadly Dispute is often motivated by the need to reach land drops, so that’s a case we’ve covered already; however, T3 Ob Nixilis is something where we’re losing. We can somewhat T4 animate Mutavault + sacrifice. That is not ideal at all and is among the trade-offs we make for this list. We went down to 70%/74% (play/draw) with 7 enablers (Cats + Harvesters) for Ob Nixilis while we had 79%/83% with 9 (Cats + Witness + Harvester).
Note aside : the following website is great for calculating probabilities. Maybe I’ll write something about it someday if you are interested in that, tell me in the comments -
https://stattrek.com/online-calculator/hypergeometric
Three vs Four Cats
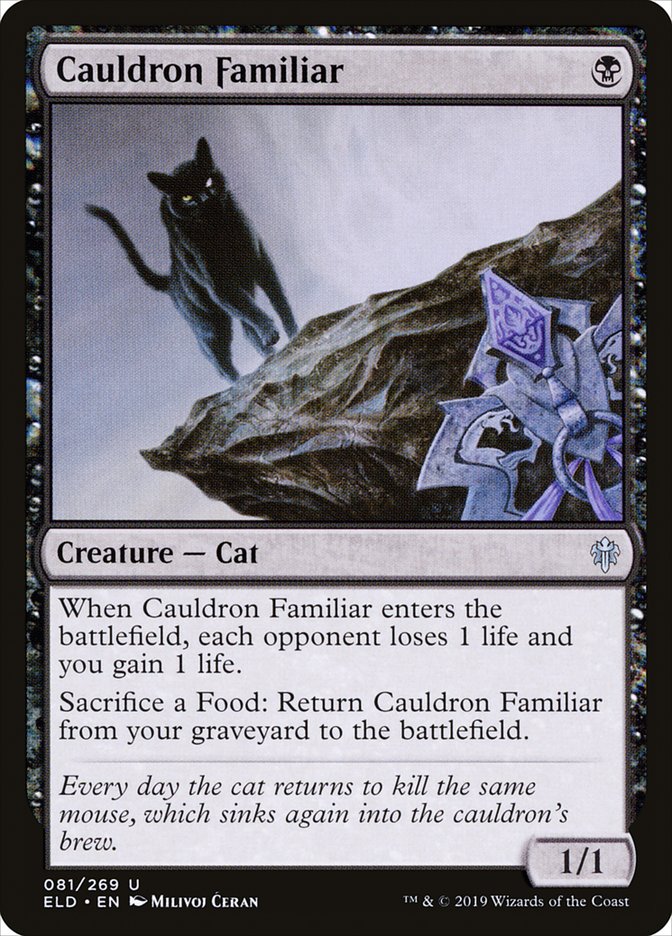
The debate between choosing 3 and 4 cats has persisted for several months, and settling on one side is quite challenging. To be perfectly candid, I'm currently utilizing 3, but I could envision myself further developing my opinion in the future.
The advantages and disadvantages are quite straightforward. The goal is to maximize your chances of having access to one cat while minimizing the likelihood of encountering two of them. Another perspective is to ponder the worst-case scenario for each option: would you rather draw 2 of them (if you play 4) or none of them (if you play 3)?
You can navigate out of the situation where you draw two of them; you can sacrifice them to Deadly Dispute primarily or trade them for some amount of life (perhaps a large Adeline charging?) which ultimately provides some form of card advantage. However, Rakdos Sacrifice is already prone to slow starts with low-impact cards. Add a mulligan and an opponent playing cards to that, and you can easily fall significantly behind.
My perception of Rakdos Sacrifice is to play it as Rakdos Midrange until the mid-late game, at which point you "unlock" your synergies. Therefore, I'd prefer to draw 0 cats than 2 because I am going to see the top 20 of my library, which is usually sufficient to find the one necessary cat (71% with 3 cats, 81% with 4 cats).
That's why I play 3 of them, but this does cause issues, especially with Ob Nixilis in the sideboard without Unlucky Witness. The debate continues.
1 Reckoner Bankbuster / 1 Kroxa
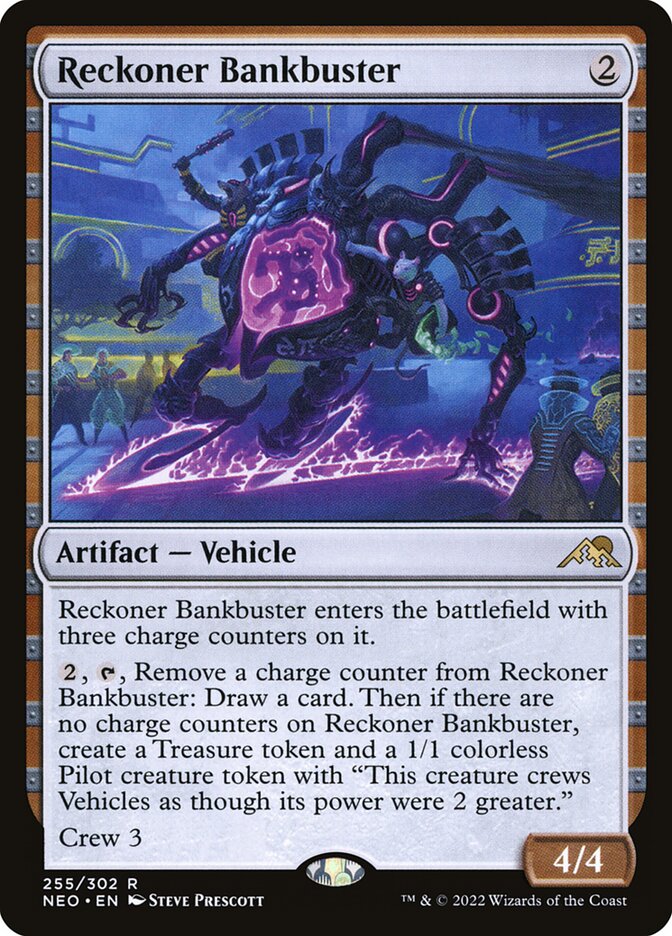
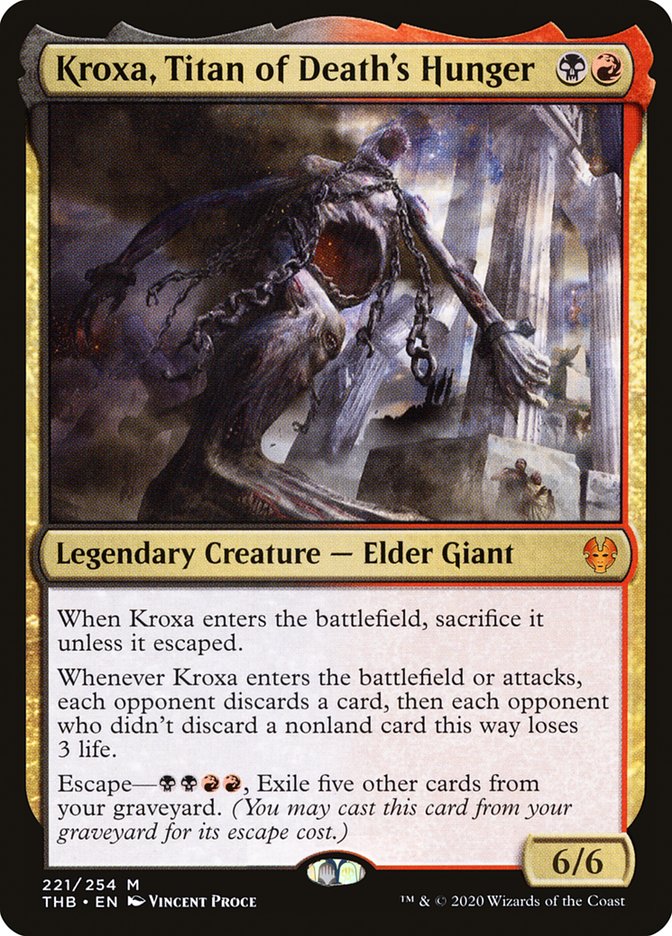
Initially, I was inclined to play 2 Bankbusters, and speaking on an individual basis, I do prefer Reckoner Bankbuster. The objective of this card is to provide additional means to assemble synergies, thanks to all the cards drawn and tokens provided. However, there are two issues with Bankbuster. Firstly, it's an artifact, and opponents already bring artifact hate against us. Secondly, drawing two of them is dreadful, or at the very least, requires a very specific matchup to excel.
Combining them prevents the scenario of drawing two and there are specific matchups (such as Phoenix) where a 6/6 body is challenging to eliminate. Additionally, our strategy in many post-sideboard matchups is to go over the top (Phoenix included!), so having a recurring threat is immensely useful.
Transformational Sideboard Plans
Another concept we're exploring with this list is transitioning into an even more Rakdos Midrange posture post-sideboard. When attempting to assemble strategies and opponents seek to disrupt them, you may end up with a Cat that isn’t contributing. Instead, we side them out, evading the hate, and introducing standalone cards.
Matchup & Sideboard Guide
Rakdos Midrange
On the draw

On the play

This matchup involves numerous shenanigans, and I'll delve into them, but the overarching picture is 57 cards + 3 Sheoldred vs. 52 cards + 4 Mayhem Devil + 4 Fatal Push.
In the main deck games, our synergies can’t be disrupted, or not significantly enough to prevent us from assembling them. So, it boils down to a) the ability of Rakdos Midrange to out-tempo you or b) Sheoldred propelling them to victory.
If it weren’t for Sheoldred, RB Midrange would very rarely out-tempo RB Sacrifice in the main deck games. Sheoldred is such a menacing card that the focus shifts to trying to answer everything without utilizing our tools that could deal with a Sheoldred (primarily Fatal Push). Consequently, the apprehension of a future threat can result in being on the back foot presently due to the immediate threats we strategically choose not to answer. This can be quite impactful and lose games on its own, but it’s even more lethal to face a Sheoldred we can’t answer.
A key and brutal interaction is to use Claim the Firstborn on the opponent’s Bloodtithe Harvester. The vampire can sacrifice for itself even if you don’t have a Blood Token, acting as a R: destroy target creature, and that is merely the baseline.
Post-sideboard, Rakdos Midrange will sideboard lightly, with options like Abrade, Kolaghan’s Command, Skysovereign, Hidetsugu, and Pithing Needle. Essentially, they aim to destroy our cards. They won’t have all of those tools, typically 3 slots in total, and side out some Bonecrusher (Stomp can be weak vs. Deadly Dispute/Witch’s Oven) and/or some Bloodtithe Harvester to prevent blowout effects.
One method to counteract those “destroy everything” cards is to disrupt them with Thoughtseize. The issue is that the games are lengthy, so you are not very likely to hit the sideboard cards with it, and you are also very likely to draw your Duresses while hands are empty or life totals are pressured. We still keep two of them on the draw; a Fable on the play can be problematic, every answer to Sheoldred is welcomed, and we have rummage effects so if we don’t draw too many dead cards, we have solutions.
Our primary plan revolves around card advantage + removals; we bring in an Outpost Siege. It’s not a solitary card-advantage slot; it’s our 3rd one (with Kroxa and Bankbuster), and we felt that it was the perfect number. Drawing two can be problematic, not drawing one early is fine because games are long (same reasoning as for the cat).
Ob Nixilis is surprisingly effective in this matchup. Of course, curved on the play with the right conditions, it can be deadly. But we also found that gaining 4 life a turn can actually race or at least stall a Sheoldred, so it’s a passive Sheoldred answer while being a proactive card.
Izzet Phoenix

The Phoenix matchup has been one of the significant challenges for Rakdos Sacrifice since the reprinting of Sleight of Hand.
Main Deck Games
Main Deck games are quite challenging; your clock is very slow, and Phoenix has the threat of their time-walk combo, which we can’t really counteract. Therefore, we try to push damages, but our creatures trade unfavorably against their highly efficient removals, which exacerbates the situation.
I've discovered that not providing creature targets to Phoenix can make it more difficult for them to bring back their Phoenixes. This is a useful strategy when we have cats, manlands, and can construct numerous sacrificable game objects for a substantial Mayhem turn.
However, most of our victories stem from a timely Thoughtseize in the early game on the right blue card or Izzet Phoenix drawing too many creatures, allowing us to trade our removals with their creatures favorably.
Post-Sideboard Games
Post-Sideboard, things shift significantly. Phoenix often sides out 2 Spell Pierce, 1 Temporal Trespass, 1 Galvanic Iteration, and a couple of other things (often a Thing in the Ice) and brings in 2 Saheeli, 2 Crackling Drake, and 2 Brotherhood’s End. Things may vary from one list to another; some run an Abrade, or more Drakes, but the general picture is this one. Essentially, they can’t maintain the combo because graveyard hate exerts too much pressure on delve cards, and they bring in threats to trump it (Saheeli / Crackling Drake).
The “natural” sideboard card Rakdos Sacrifice typically uses is Unlicensed Hearse, but it falls short against Crackling Drake, Saheeli, and Brotherhood’s End. So, we prefer the route of Go Blank instead to continue combating the graveyard, yet dodge their sideboard and engage in the card-advantage war.
Dreadbore excels in this matchup. Saheeli can be challenging to answer with creatures against Fiery Impulse, and we actually have all the necessary tools to destroy everything. These games are lengthy, but we can be quite confident post-sideboard.
Mono-Green Devotion

Main deck and sideboard games essentially follow the same strategy, and our plan is to obliterate everything. They don’t significantly improve post-sideboard (sometimes boarding a Wand, Citadel, and Mightstone while cutting some elves). Karn can be a real issue, so maintaining a board is key (we can’t play control against them), and they have inevitability anyway.
When executing a “destroy everything” game plan against Mono-Green, the entire challenge is to destroy more mana than you are spending. Mono-Green is going to out-tempo anyone, so at some point, you need a very favorable trade. Midrange accomplishes that with Extinction Event, which is okay, albeit a bit slow, and requires creatures to kill the planeswalkers.
Sacrifice manages that much better with the threaten effects. Stealing the blocker and making it attack Kiora is often enough to kill it. A very juicy and quite common play is to use Furnace Reins on a Cavalier, sacrifice it, then get back Reins on top of our library. This play is usually game-ending.
Dreadbore shines here once again. Of course, Karn is good against us, but Kiora is hard to kill with creatures, and Dreadbore is incredibly mana-efficient in those spots.
We have another juicy play, which is to claim an elf on turn 2 and use it to help cast a Deadly Dispute. That doesn’t win on its own but it’s already a significant start that will often be enough.
Lotus Field Combo

They possess a combo that can essentially only be halted by depleting their life total. We introduce ways to slow them down and side out cards that don’t contribute to this strategy.
The tricky part from their side is they often bring in some Dromoka’s and try to leverage us sideboarding out removals by hard-casting Vizier of Tumbling Sands. We have our Devils in any case, but we also bring in a couple of Dreadbores to avoid being caught off guard. We might not bring them at all if we had more slots for this matchup, but we are exerting a lot of effort for the midrange matchup and couldn’t extend further here.
This Damping Sphere could easily be a second Duress; this is a choice we made because we felt traditional control would see less play than usual and Lotus would be on the rise (and we were right!).
Boros Heroic

This matchup epitomizes the classic aggro vs. control dynamic; they need to eliminate us before we eradicate each and every one of their threats.
They are quite light on threats and their creatures are notably weak on their own, but they have a plethora of support spells. This means we need to strategically determine the key moments to cast our removals and avoid, at all costs, wasting our removals into their protections.
One strategy to effectively amplify our impact is to block their creatures with ours, placing them in a situation where they must spend support cards to survive the combat. Then, we cast our removals when the coast is clear.
Boros Heroic is an archetype that can deliver lethal damage seemingly out of nowhere quite easily. Inflicting 16 damage is a common occurrence for them, which means not respecting them will result in severe punishment. We don’t really need to sneak in cheap damage; they have such a difficult time overcoming a devil that we don’t really need to concern ourselves with their life total.
Post-sideboard, they might introduce some Reidanes but can’t have many since their side-out options are quite limited. Reidane isn’t a significant concern; it's expensive, clunky, and we have some Abrades. The game plan remains the same post-sideboard; we just have a couple more removals.
Until next time,
Rémi Fortier