Pioneer Wurm Creativity Guide: A Solid, Massive Wyrm

Chronicles of the Metagame
Metagames follow a certain logic – or so we like to convince ourselves. At least a chronology.
The rough idea of the early days gives way to a more solid one, gets refined in secret, and comes back into fashion before innovation, that tireless boxer with a hundred arms, strikes again to knock it down. Decks follow one another, week by week, like increasingly tough wrestlers in a ring or increasingly fierce predators (in an arena, if you prefer) until the apex, that mythical ultimate predator that will dominate its metagame until the next release.

All of this is very evocative and satisfying, but still, somewhat of a construct of the mind.
Sometimes, the right idea is there, in plain sight, but no one bets on it. The crowd would scoff at its desire to even step into the metaphorical ring. It's a struggling phoenix, whose ashes are looked upon without believing in its (ever-continuous) rebirth; it's a weak rogue, who only prompts one to watch their purse while having deadly contacts. These unsuspected killers, for some reason, often have a blue gleam deep in their eyes.
There are also the impostors, who triumphantly enter the arena with grandiose introductions like "The Grinning Ignus!" or "The Storm Herald!" They certainly achieve some victories against insecure, impressionable opponents until it's realized that they only see with one eye or have a limp. Tournament archives overflow with these one-hit wonders.
And then, there are the old glories.
This is where the chronology gets tangled and logic goes off the rails. Players, as mentioned, are not rational. They focus on trivial details in wrestlers: an eye-catching tattoo, an impressive beard... They want fighters who resemble themselves, who fit their criteria, their heuristics; in short, who look the part. Above all, they love novelty. Innovation, a kind of Shiva, serves as their deity. Following the ancient laws of sports betting, they are reluctant to place their votive coins where others have already bet.
So what about the heroes of yesteryear? A penniless dwarf outlaw, begging for the services of luxury dragons and drooling over a legendary chariot whose piloting is beyond her? A fallen pseudo-god, not fully recovered from a solar lance blow to the gut, who dreams of a fantastical-sized wyrm as his champion and instrument of revenge?
They're rejected at the entrance! It would be different if they had even a single coin in their begging bowl... But if players are wary of overcrowding, and the patronage of innovation can alleviate their loneliness, there's no question of being the last one to believe in something. Beggars and relics have no place in the ring. Evolution moves forward. Metagames do too.
Thus, in the low percentages of oblivion, the god of the revels and his big fat wyrm languish.

(5 - 4)
55% in Legacy European Championship Athens @Legacy European Tour [456 Players] — 10-Jun-2023
| Creature [6] | ||
|---|---|---|
| 1 Worldspine Wurm | $5.99 | |
| 1 Xenagos, God of Revels | $7.99 | |
| 4 Fable of the Mirror-Breaker | $21.99 | |
| Instant [26] | ||
|---|---|---|
| 4 Impulse | $0.39 | |
| 1 Spell Pierce | $0.59 | |
| 4 Volcanic Spite | $0.35 | |
| 4 Fiery Impulse | $0.59 | |
| 1 Dig Through Time | $0.49 | |
| 3 Spikefield Hazard | $0.79 | |
| 4 Big Score | $1.99 | |
| 3 Make Disappear | $0.49 | |
| 1 Negate | $0.35 | |
| 1 Secrets of the Key | $0.35 | |
| Sorcery [4] | ||
|---|---|---|
| 4 Indomitable Creativity | $2.99 | |
| Land [24] | ||
|---|---|---|
| 3 Spirebluff Canal | $4.49 | |
| 3 Stormcarved Coast | $3.99 | |
| 1 Otawara, Soaring City | $24.99 | |
| 4 Riverglide Pathway | // | $9.49 |
| 1 Shivan Reef | $1.29 | |
| 3 Mirrex | $7.99 | |
| 2 Mountain | $0.01 | |
| 2 Sokenzan, Crucible of Defiance | $6.49 | |
| 1 Island | $0.01 | |
| 4 Steam Vents | $17.99 | |
| Sideboard [15] | ||
|---|---|---|
| 1 Aether Gust | $0.35 | |
| 1 Negate | $0.35 | |
| 1 Dig Through Time | $0.49 | |
| 2 Hullbreaker Horror | $4.49 | |
| 1 Disdainful Stroke | $0.35 | |
| 2 Mystical Dispute | $0.39 | |
| 3 Rending Volley | $2.29 | |
| 2 Brotherhood's End | $7.99 | |
| 2 Shark Typhoon | $3.49 | |
 $116.85 Tix @cardhoarder
$2.92 / Week @cardhoarder
$116.85 Tix @cardhoarder
$2.92 / Week @cardhoarder
 $269.03 @tcgplayer
 $372.55 @cardkingdom
So, why believe in Xenagos - this god that, strangely enough, you don’t want to see?
Creativity Decks in Pioneer
Let's start with a brief overview of the Pioneer format. It's vast; however, at the beginning of our preparation for the Regional Championship, Rakdos Midrange held a dominant position at over 20% of the field, followed in Tier 1 by Mono-Green and the group consisting of various Creativity decks, one of which had just won the LMS Valence.
This is where an important distinction comes into play: although tournament organizers often group them together, the different Creativity decklists actually have very little in common.
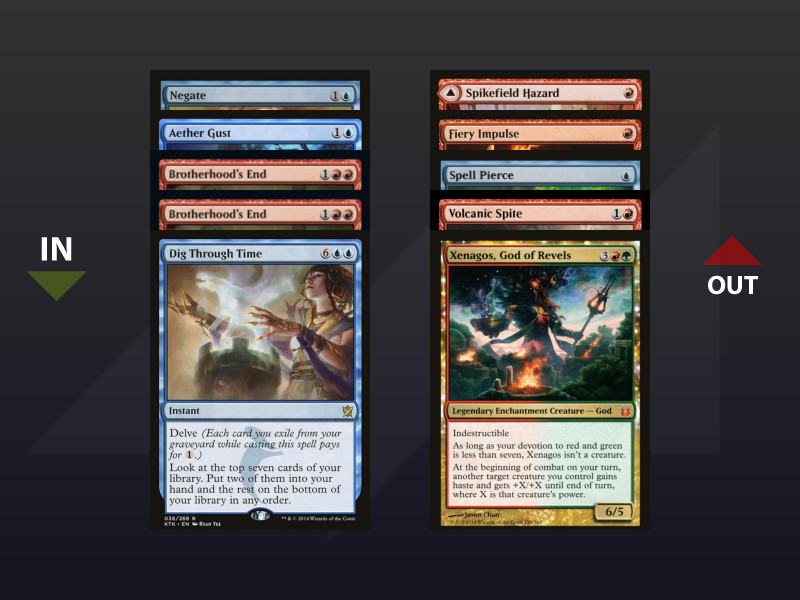
Version #1 - Wurm + Xenagos
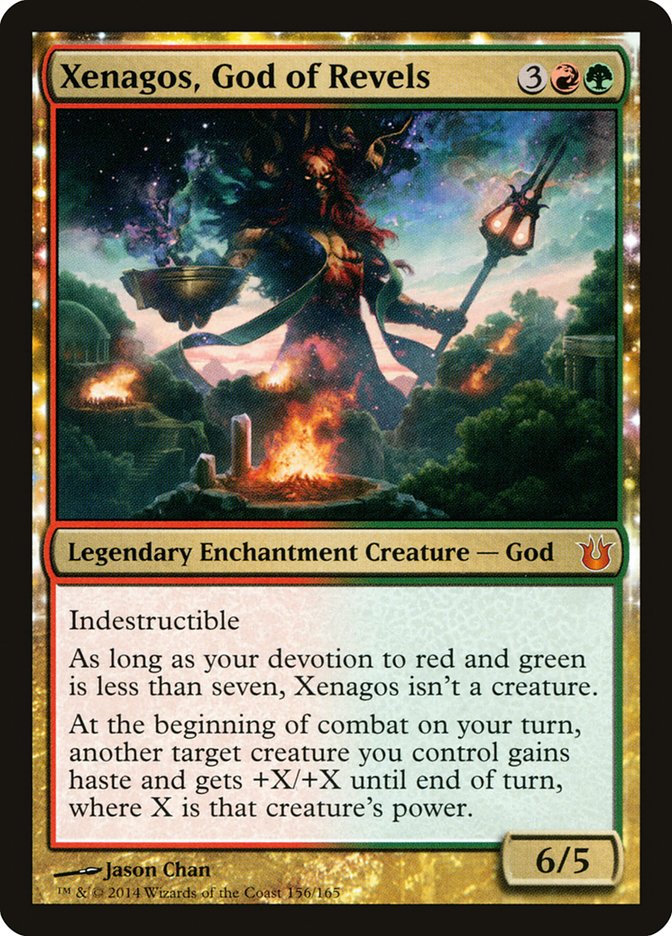
One version, which had fallen out of favor by that point, features an instant win combo with Wurm + Xenagos, at the expense of being somewhat vulnerable to main deck interaction (especially the ever-present Otawara, Soaring City).
Version #2 - Magma Opus & Torrential Gearhulk
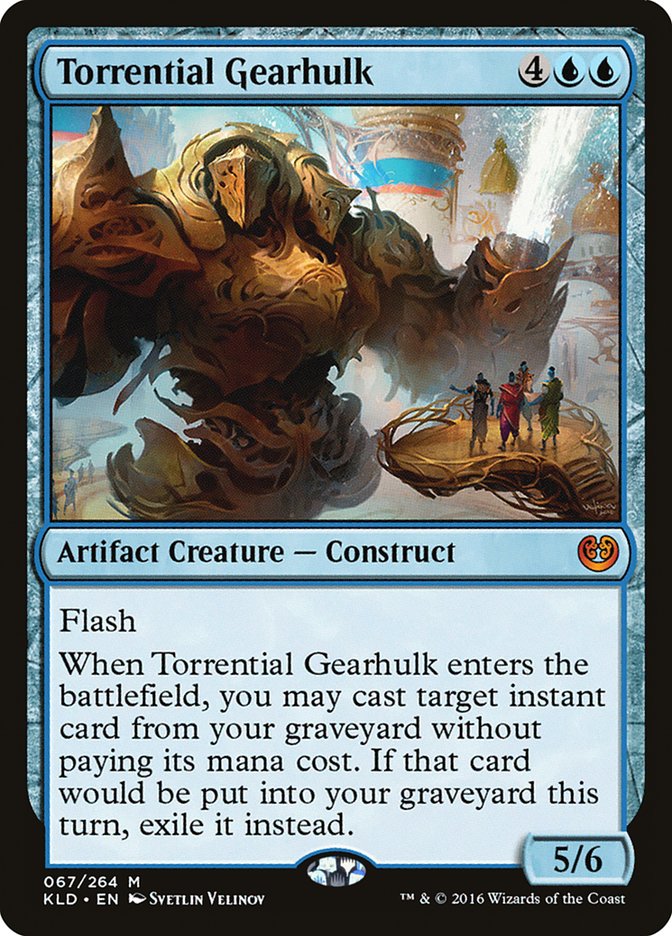
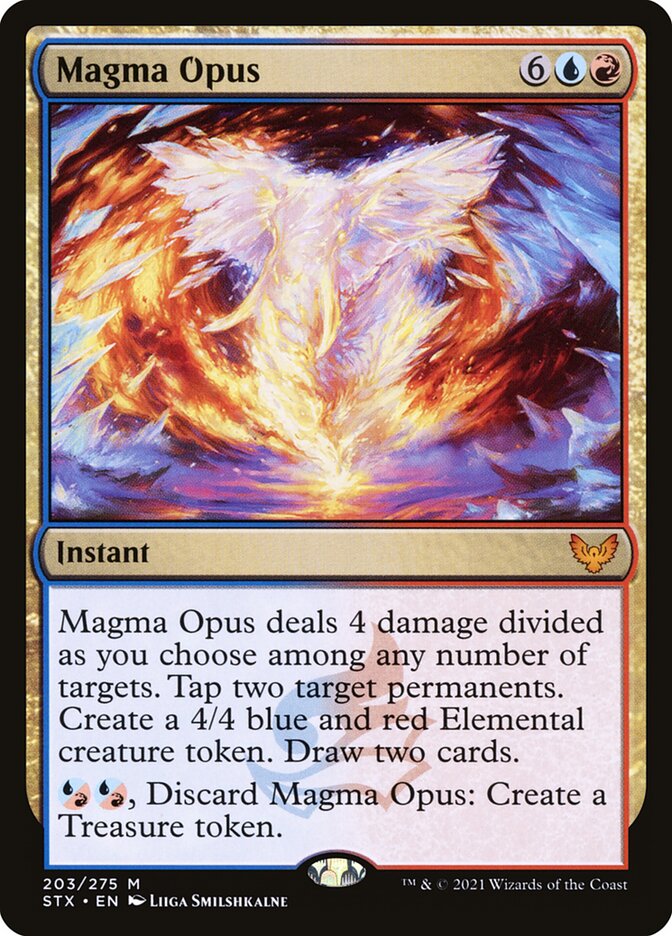
Another, more popular version, aims to accelerate Torrential Gearhulk, which ideally copies Magma Opus.
Version #3 - Atraxa
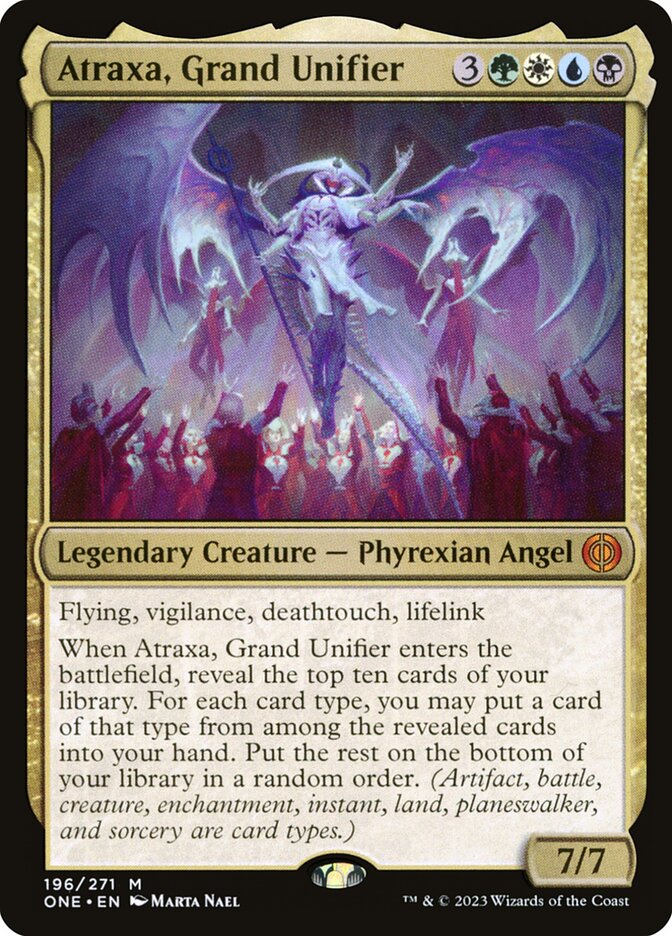
A third variation tops off its curve with Atraxa, Grand Unifier.
Since they don't share the same win condition, they also don't play the same support cards, and it's essential to understand their differences.
Finding the Best Version
Wurm Creativity: Combo Kill
The Wurm version had won PT Philadelphia in the hands of Reid Duke a few months ago, and when I was analyzing the format on paper (before even playing a single game with it), I couldn't understand its decrease in popularity. A combo kill is a strong argument, whether assembled quickly or not, to force the opponent to respect us and give us time to amass resources.
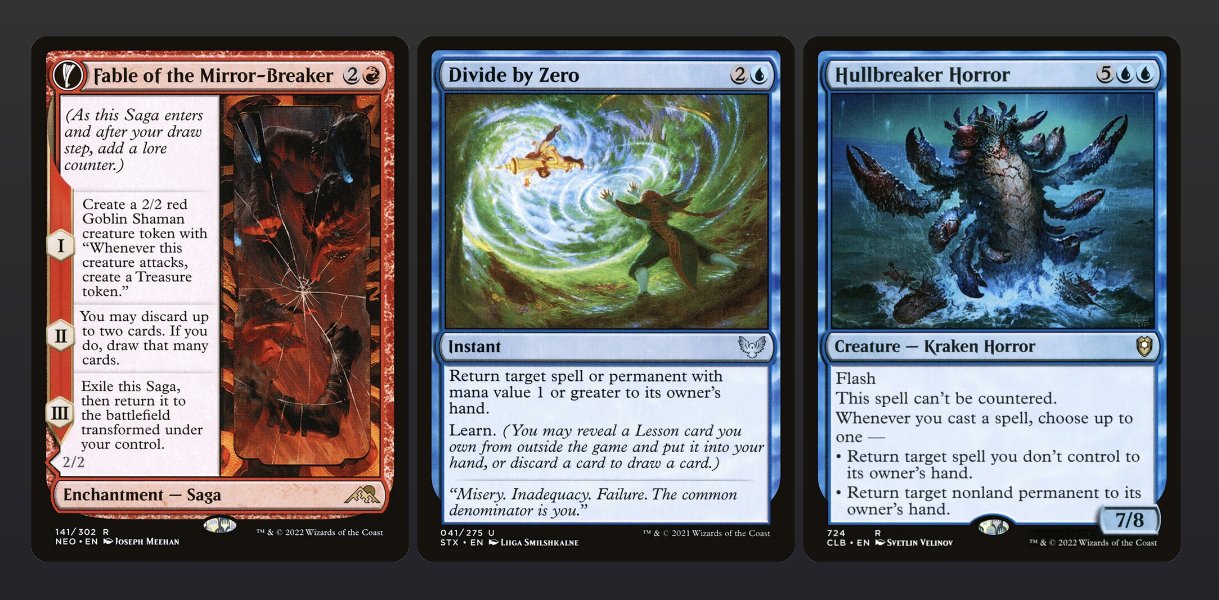
With enough time, a combo-control deck with permission (the old name for counterspells) and a semblance of an alternative plan usually manages to execute its combo through interaction. In this case, Big Score allows for accumulating both cards and mana against an overly cautious opponent, and Fable of the Mirror-Breaker provides an alternative kill while reinforcing the main one, since its flip side can copy our Wurm to generate three 5/5 creatures at the end of the turn.
Gearhulk Creativity: Is It Better Than Phoenix?
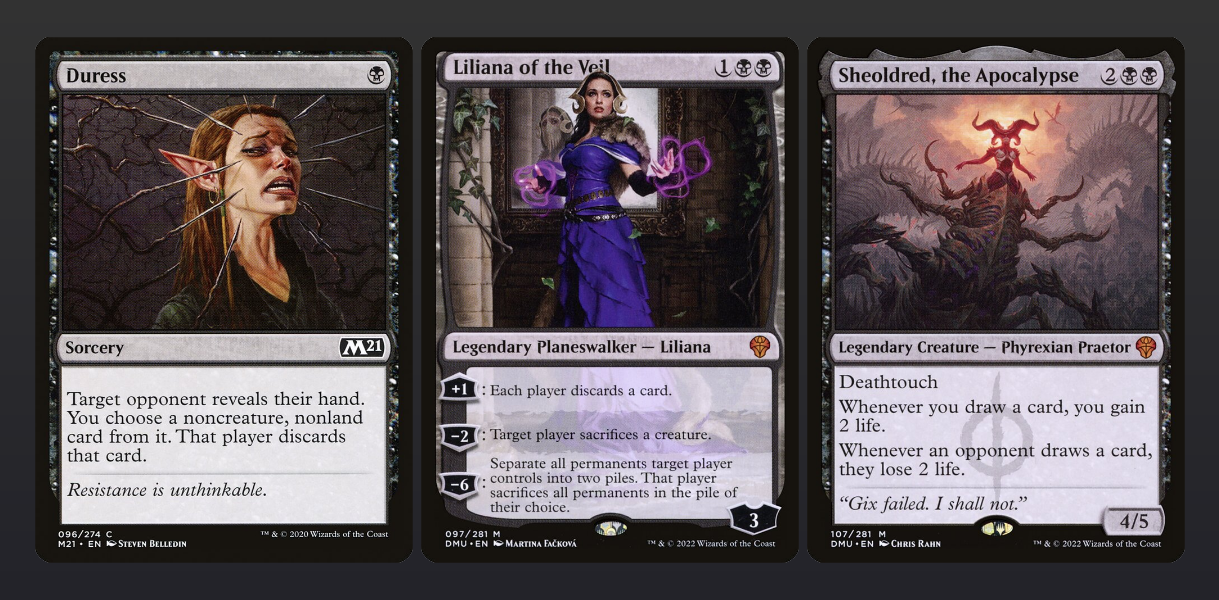
As the Gearhulk version was trending, we had multiple copies on hand and it was the first to be tested. However, it quickly became apparent that it was not very functional. With so many slots occupied by 6-drops and 8-drops, in addition to the combo and enablers, we often found ourselves missing land drops due to a lack of selection spells like Impulse, or crucial interaction windows. The deck is just too clunky. And to make it even worse, it doesn't even win! While Gearhulk and Opus may be enough to grind through a deck like Rakdos (and even then, not always against Sheoldred, the Apocalypse), all it takes for MonoG is to resolve a simple Cavalier of Thorns to hold the board.
As for decks like Keruga Fires or Lotus, with their strong late game, staying untapped will keep them in check for a while, but - just like Wurm, in the end - they'll eventually slip through a Make Disappear or Divide by Zero, and unlike Gearhulk... when they do, they win.
Another notable drawback of the current Gearhulk versions is that they require 2 to 3 sideboard slots in a format that, due to its vastness, demands a wide variety of tools and in a deck that already suffers from some heaviness. As a result, we have to keep Gearhulks and/or Opuses in matchups where we would theoretically want to remove them, and we lack reactive cards in each role: removals, counterspells, etc. If you still insist on playing a Gearhulk version, I recommend limiting yourself to this particular lesson:
Once the question of the kill is settled, what justifies playing Creativity over, say, Phoenix?
What justifies playing Creativity over, say, Phoenix?
This way of phrasing the question (which was my personal alternative when preparing for Athens) is interesting because while both archetypes have common colors and cards, while both are more or less capable of overpowering the entire format in the late game, turning control post-board and playing at instant speed, they still don't do all of this the same way, and their approaches to match-ups differ.
Matchups Overview
Against Rakdos, Creativity relies on its one-card combo, taking advantage of the opponent's inability to fight against topdecks, whereas Phoenix aims to bury them under card draw effects. The first approach works better: I would say that Wurm Creativity sits between 55 and 60% against Rakdos, while Phoenix barely reaches the 50% mark. Against Lotus, Phoenix's worst match-up, Creativity benefits from playing much better at instant speed.
On the other hand, due to the lack of creatures, all creature match-ups become more difficult: MonoW goes from balanced to unfavorable, MonoG remains favorable but less so. Creativity also struggles to resolve its cards against UW Control and Spirits. However, if the blue match-ups may seem challenging at first, the ability to side into a red-based control deck against creatures and a blue-based one against spells, while maintaining the pressure of its combo, allows Creativity to come out ahead in almost all sideboarded games. Rakdos is, I believe, the only deck that does not lose percentage points in the match-up between Main Deck and Sideboard.
Considering the recent decline of Lotus and the relative resurgence of aggressive decks, it's difficult for me to definitively state whether Creativity or Phoenix is superior at this time. I believe that both decks have the common trait of being strong choices for highly skilled technical players. I previously mentioned Phoenix and Rogues in the introduction as examples of "best decks" that truly shine in the hands of proficient players; Creativity has a higher floor, providing more free wins, but there are still plenty of opportunities for mistakes and optimization can be challenging. I would recommend playing this deck not only to succeed in the Pioneer format but also to improve your overall Magic skills.
The deck and its mechanics
Combo Main Pieces
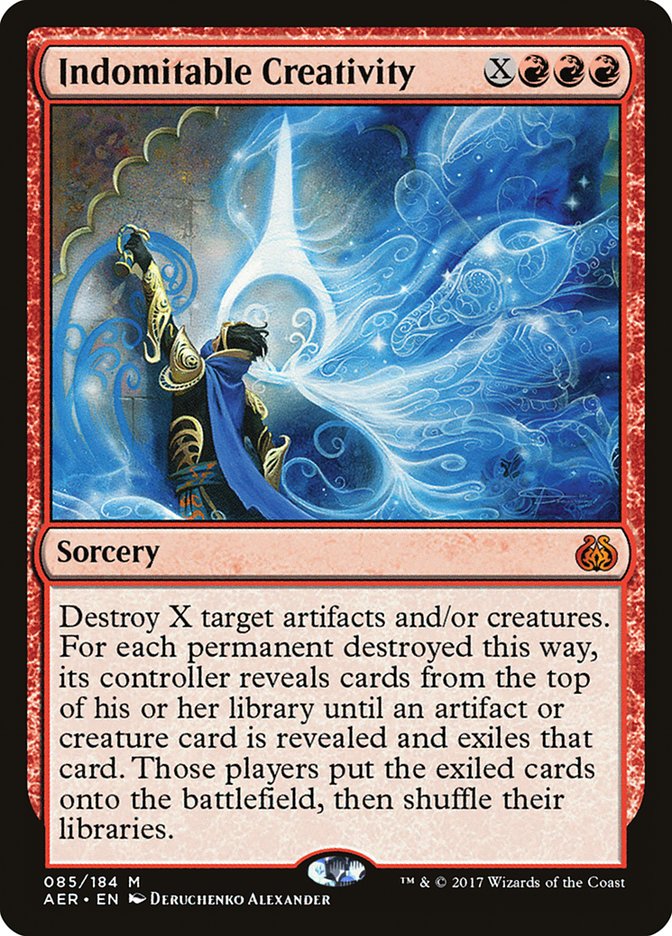
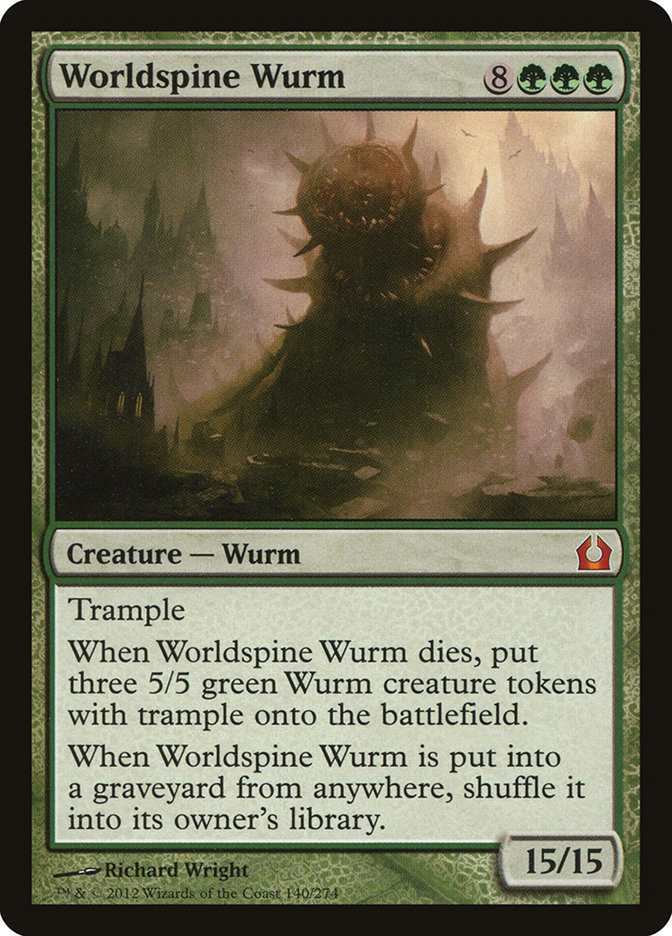
Most G1 Creativity setups involve assembling three key components: lands (at least five), token generators (for at least two tokens), and Indomitable Creativity with X≥2. Outside of rare situations, such as the Angels matchup, particular MonoG boards, or Rakdos shells that have managed to scrape together enough life points, the 30/30 Wurm usually ends the game - and if it doesn't do so now, it'll do so on the next turn.
The first unique flaw of this combo is that you don't want to draw the pieces
The first unique flaw of this combo is that you don't want to draw the pieces (!). The Wurm will shuffle itself back into the deck if discarded, so a Fable chapter 2 or a Big Score can temporarily do the trick to get rid of it. Note that with Fable, you resolve the entire ability first, which leads to drawing the two cards before shuffling, while discarding with Big Score is an additional cost and can therefore cause you to redraw the Wurm immediately.
In regards to Xenagos, it's our worst enemy, the biggest black ball to draw. Theoretically, we can hardcast it in several ways: the treasures from the Shaman and Big Score, Mirrex, but the tempo loss and exposure to removal while fetching the Wurm are often too severe, and Volcanic Spite remains the best solution. In a metagame where Spikefield Hazard is less appealing, Valakut Awakening could complement Spite.
Due to these "fail cases," setting up the combo requires constant focus and attention. Depending on the situation, you must be prepared to slowroll a Spite or a Mirrex and avoid drawing unnecessary cards when you're about to go in for the kill.
Combo Enablers
Enablers come in various forms, each with its own unique benefits. Big Score is the most common, as it digs into Creativity while allowing for a later kill thanks to the generated mana.
Sokenzan tokens sometimes help avoid drawing at critical moments; they are susceptible to standard removals but dodge anti-artifact effects.
An unanswered Fable generates a significant amount of resources, including two eventual 2/2 bodies, making it the premier enabler.
Secrets of the Key is the newest addition, increasing the goldfish frequency and providing free value when discarded through Fable or Big Score.
Another nuance of initiating the combo is managing the X value of Creativity. Targeting more than two permanents often allows you to navigate around small removal spells (like Fatal Push or Stomp) or anti-artifact cards (such as Boseiju or Abrade). This category of responses, which doesn't affect the payoffs, can be easily dealt with by anticipating your opponent's moves.
Targeting fewer than two permanents isn't always ideal, but sometimes it's necessary. The coin flip of a Creativity for 1 hitting a Wurm is a completely valid play, which in my opinion, players are often too hesitant to attempt in games where their chances of winning wouldn't be much higher. Of course, it's much easier when you know that Xenagos is beneath the deck due to a Spite, an Impulse, or a Dig Through Time. In such cases, it's possible to trick your opponent by choosing two targets to bait out a removal spell.
Less commonly, targeting opposing creatures can lead to victory. The main instances I've come across are Koma, which can take down the Wurm, and Misery's Shadow, which exposes it to a black hard removal.
However, it's important not to forget that Creativity can act as a (admittedly poor) removal spell and that, in specific situations, replacing a lethal Sheoldred with a 3/X or clearing a Cavalier of Thorns out of the way can save the day.
Once resolved, the combo has the advantage of being invulnerable to most removal played in Pioneer.
Dealing with Bounce Spells
It's probably time to talk about Otawara, our (other) worst enemy.
We can defeat them in two ways: strategically, by applying pressure with Fable to force the opponent to spend mana, or tactically by resolving multiple Creativities in a row. Of course, this second option requires having the resources to do so.
One time, I hardcasted a Wurm. This idea isn't so far-fetched considering Xenagos grants haste to the Goblin Shamans, which accelerates the accumulation of treasures. If you have Reflection of Kiki-Jiki at that moment, you can attack for 51+ because a pair of Wurms animate Xenagos. :)
Divide by Zero has a similar effect, but it can be countered.
Card Drawing & Card Selection
As with any one-card combo deck without redundancy, card selection is crucial. Impulse allows us to keep our answers up, find Fable on turn 3, Creativity later on, and also provides some information about the locations of our kill pieces.

In smaller quantities, Dig Through Time is, as always, fantastic: the second copy in the sideboard is justified by the idea that we interact more with 1-for-1 trades, making games more grindy and filling our graveyard faster.
In a meta with a decent amount of graveyard hate, Go Blank, and Liliana of the Veil, Behold the Multiverse is worth considering. But in non-Rakdos matchups, we prefer the low mana investment of Dig Through Time.
Removal & Counterspells
Not much to say about removals, other than Fiery Impulse being the primary in-deck reason for choosing which cards to leave in the graveyard when it comes to Delve.
The first hard counter, Negate, which is not on Reid Duke's list, can be very important in long games where you're trying to set up your combo through multiple responses. It and the single Spell Pierce take on special significance in open decklists. Make Disappear serves as a catch-all and remains very effective in the late game, partly because the threat of the combo discourages the opponent from tapping too much mana during their turn, but also in synergy with the tokens from flipped Fable and Mirrex.
The sequence of these card draws, removals, and counterspells might remind you of another famous Izzet combo deck... Oh, don't be afraid to say it! Yes, Creativity is quite similar to Splinter Twin. In a time when this comparison has become a meme, used haphazardly, it's almost daring to think in these terms, but their gameplay and strengths are, in fact, quite alike. Both decks have a semblance of a control plan, insufficient to truly lock down the game, but they use their interactive tools to buy the necessary time and their combo potential to effortlessly slow down the opponent's development.
Lands/Manabase
I have some uncertainties about the manabase. Steam Vents and Pathway are the most obvious best lands; beyond that, it's mostly based on intuition. We want untapped lands in the early game to curve our interactions, especially in match-ups like MonoW or MonoG, but we also want the fourth and fifth freshly drawn lands to come untapped for an enabler or a Creativity. I don't have much love for painlands in general, and the format has several match-ups (including Rakdos) that can be played down to the last point of life.
Regarding Mirrex, the only real innovation in our list, I'm confident that it's better than Mutavault, at least for the first two copies. It's an excellent way to put pressure on more cautious decks and a generator of Creativity targets. Mutavault was poor at blocking the format's threats, never produced colored mana, and was fragile overall.
Riverglide Pathway will generally be played on the Lavaglide side, but be mindful to reevaluate this heuristic in blue match-ups, particularly post-sideboarding, where casting multiple counterspells in the same turn is more frequent than casting Creativity.
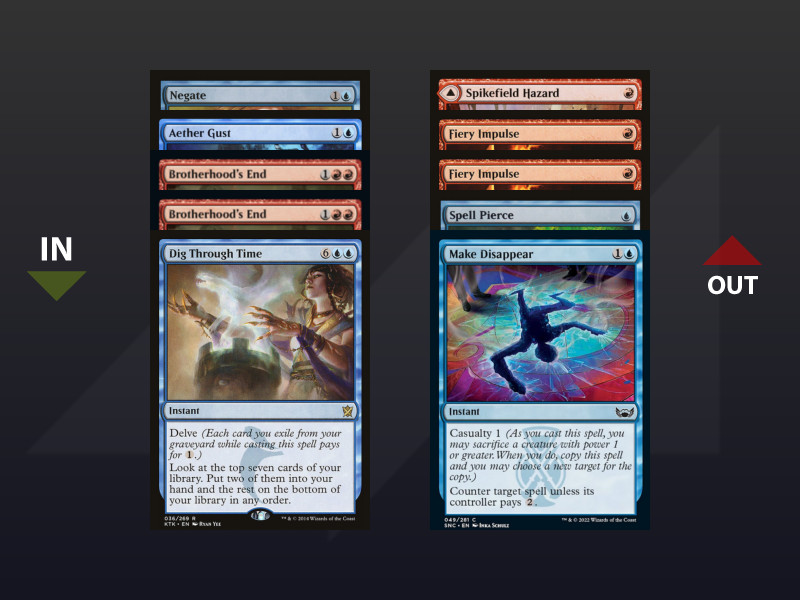
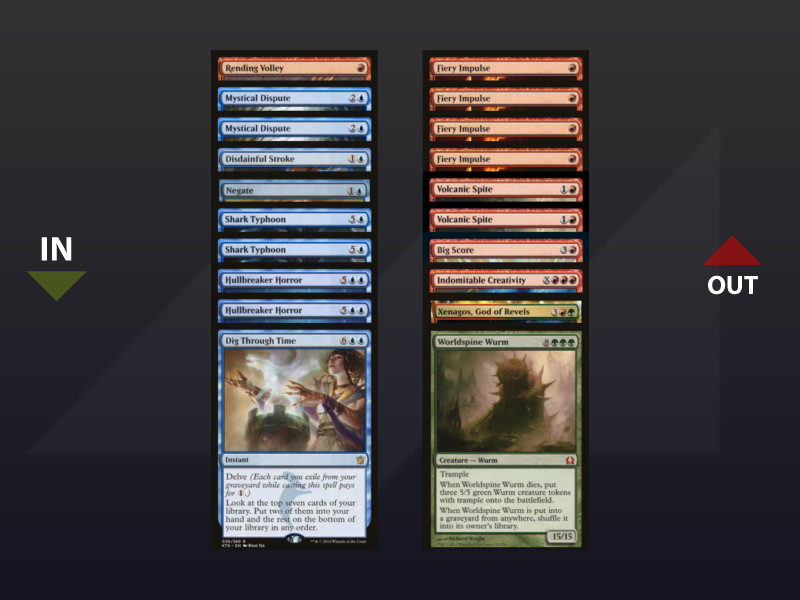
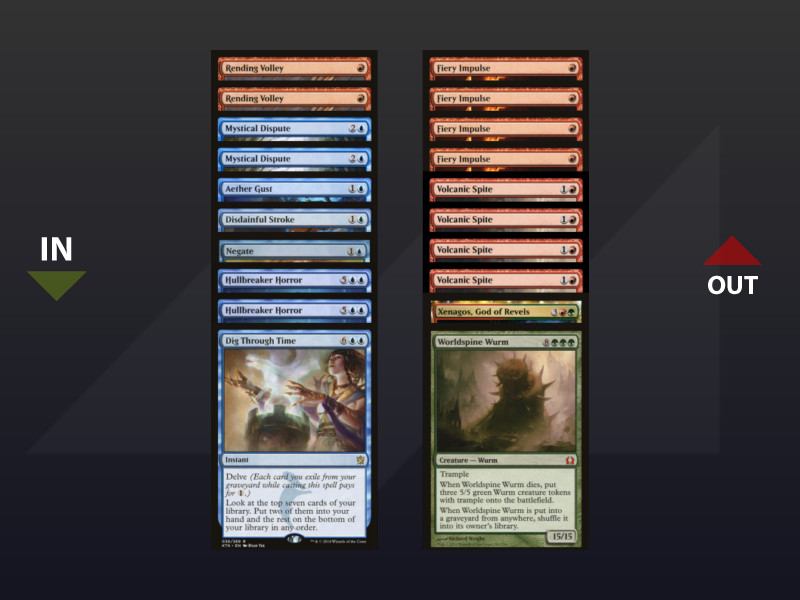
Sideboard Choices
The Big Shrimp
And so we arrive at the sideboard, that crucial moment where the Big Shrimp competes with the Big Wyrm.
As an alternative finisher, Hullbreaker Horror is the centerpiece of many sideboard plans, and understanding 1) under what conditions to make the switch and 2) what to do around it to make it work deserves a substantial paragraph.
First, I think there isn't always a single correct answer. In what I call "blue match-ups" - mirrors and pseudo-mirrors, UW Control, Keruga Fires, Spirits, Phoenix -, the Wurm combo is too vulnerable, both to counterspells on Big Score or Creativity, bounce effects, or Leyline Binding. In others, that require pure speed and/or involve black removals - Rakdos Midrange and Sacrifice, Boros Convoke, MonoW -, Horror doesn't live up to its promises. We could roughly distinguish between match-ups that are played on the board (favorable to the Wyrm) and on the stack.
We could roughly distinguish between match-ups that are played on the board (favorable to the Wyrm) and on the stack.
Some match-ups flirt with the line, and in those cases, you need to be prepared to revise your plan based on how your opponent reacts. I'm primarily thinking of Lotus and MonoG (see below for the exact plans). When you switch to the Shrimp, you become a control deck with the potential - akin to a combo - of early Creativity. You're better off if the game lasts longer because a protected Horror gives you inevitability . When you stay on the Wyrm, you're a combo deck, where control tools only play a delaying role. I encourage you to try both configurations, even in match-ups where this guide presents one as strictly superior: on one hand, you might find that the other better suits your playstyle, and on the other hand, a plan that your opponent doesn't understand always gains some value.
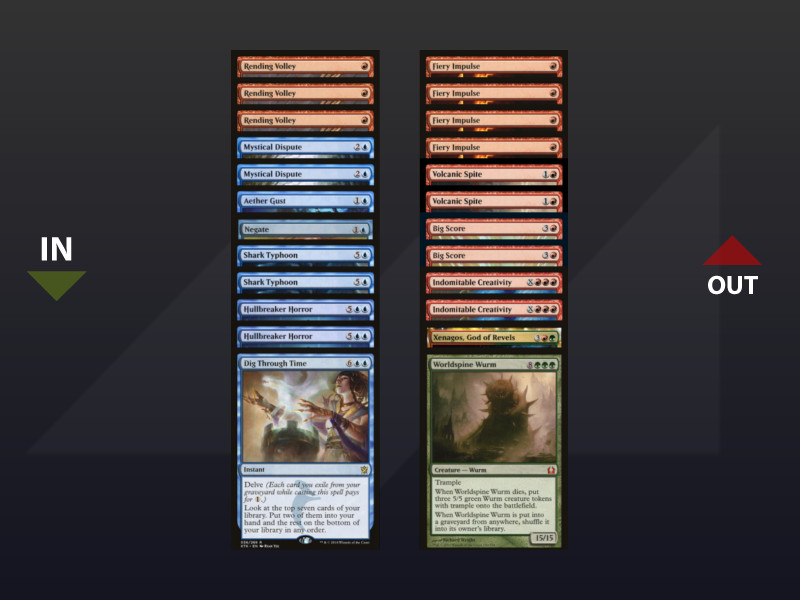
Other Cards
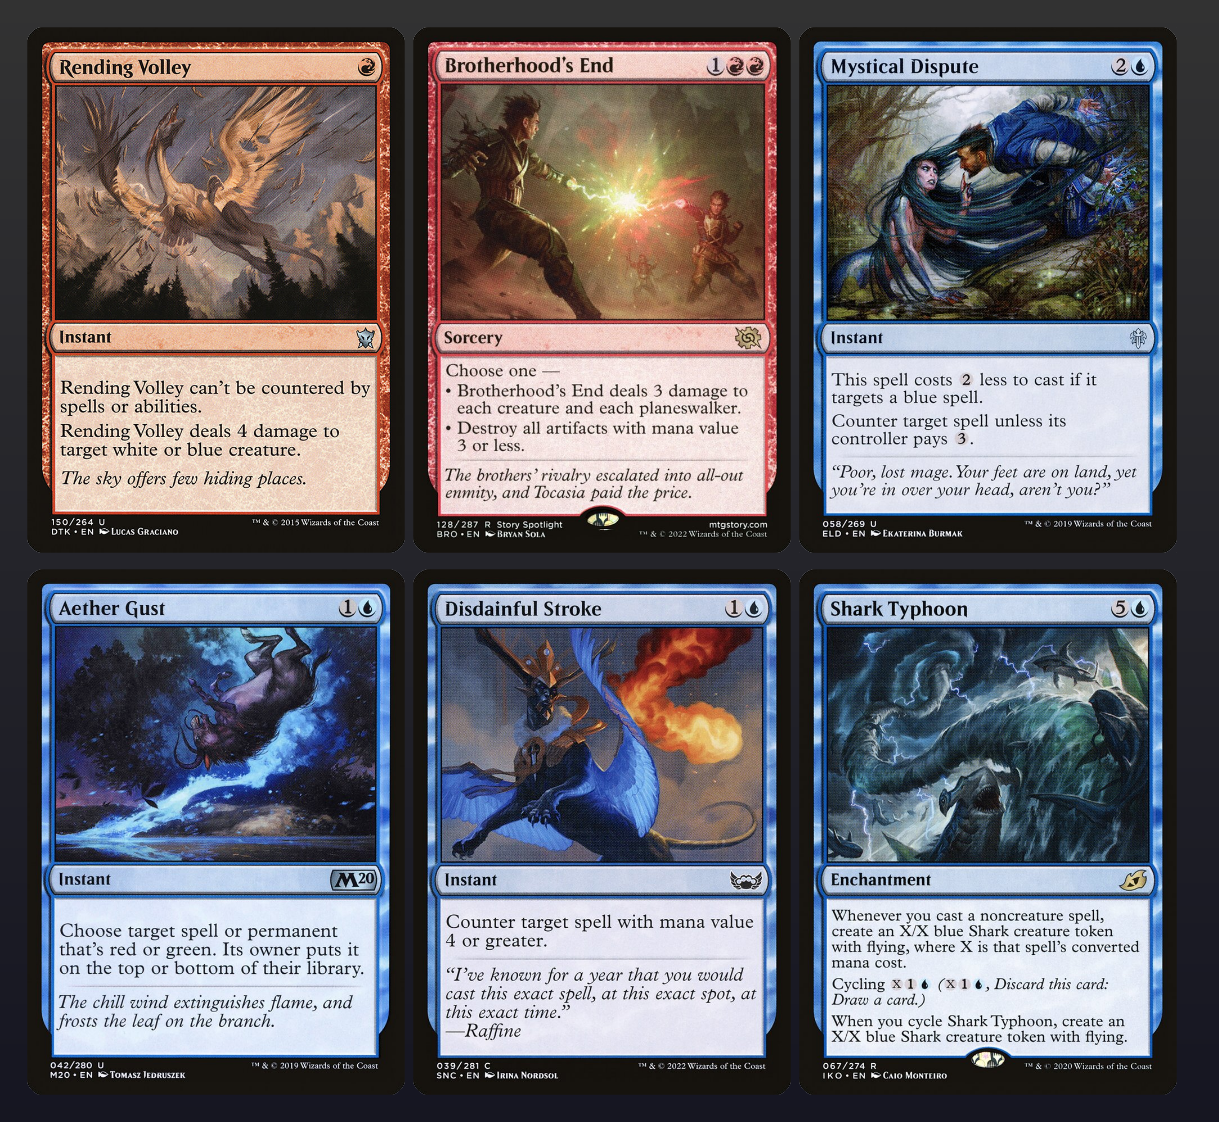
In my opinion, while the main deck and the Shrimps are more or less set in stone, the rest of the sideboard allows for various adjustments. Aether Gust, initially targeting MonoG's Troll cards, has proven useful in many marginal match-ups and I believe it's essential to play in a vast field. Shark Typhoon has lost some value with the inclusion of Mirrex, hence only two copies, but it's still the top card (along with Shrimp) for Spirits and UW match-ups. The second Brotherhood's End is a concession to the rise of white aggro decks and Sacrifice. Rending Volley and Mystical Dispute are both the most powerful and rigid cards.
As for other options, there's Behold the Multiverse, the second Spell Pierce, Abrade (with Reckoner Bankbuster as the main target), Cinderclasm to better target Convoke and Spirits at the expense of MonoW, and Soul Sear for Sheoldred. We also considered some cuter options like Bolt Bend or Mystic Reflection, but I'll let you guess the reasons.
Match-Up Guide: The Sideboard and Its Mysteries
Every time, I will start by listing my side plan on the draw, followed by any possible changes on the play.
Rakdos Midrange (~ 57,5 / 42,5)
Key cards
On the Draw
On the Play

Walkthrough
This match-up is the only one, to my knowledge, where the Wurm alone makes sense, but as mentioned earlier, it's important not to hesitate to deviate, or else you become too predictable. A Rakdos player who is only waiting for the Wurm could, for example (although I would discourage them), bring in Extinction Event. The reason for cutting the god is that Rakdos puts a lot of pressure on our resources, and even a single card can make all the difference. With just the Wurm, all you need is one permanent and four lands to get started.
Some games in the Rakdos matchup are played with a tempo strategy, featuring explosive plays like Bankbuster into Trespasser into Sheoldred that can bypass our removal suite. Make Disappear, although susceptible to discard, plays a crucial role against these aggressive starts, as does Brotherhood's End. Aether Gust primarily targets Kroxa (in addition to Fable), so you can skip it if there are few or none, or if the opponent sideboards out their Bloodtithe Harvesters.
Shark Typhoon struggles to match up against opposing creatures on the draw; on the play, it increases our threat density to withstand discard, and Big Score and Fable help speed up hardcasting. Expect Rakdos to keep some removal spells due to limited sideboard options or in a misguided attempt to interact with our combo, which may potentially throw your Sharks off-tempo.
Other games can be quite grindy, with a barrage of early discard, but these typically turn in our favor due to the power of topdecking. In general, discard plus pressure is better than pressure alone, which is better than discard alone. Discard spells often hit Creativity in most situations, so having a second copy isn't a bad idea.
MonoGreen (~ 60 / 40)
Key Cards
On the Draw

On the Play

Walkthrough
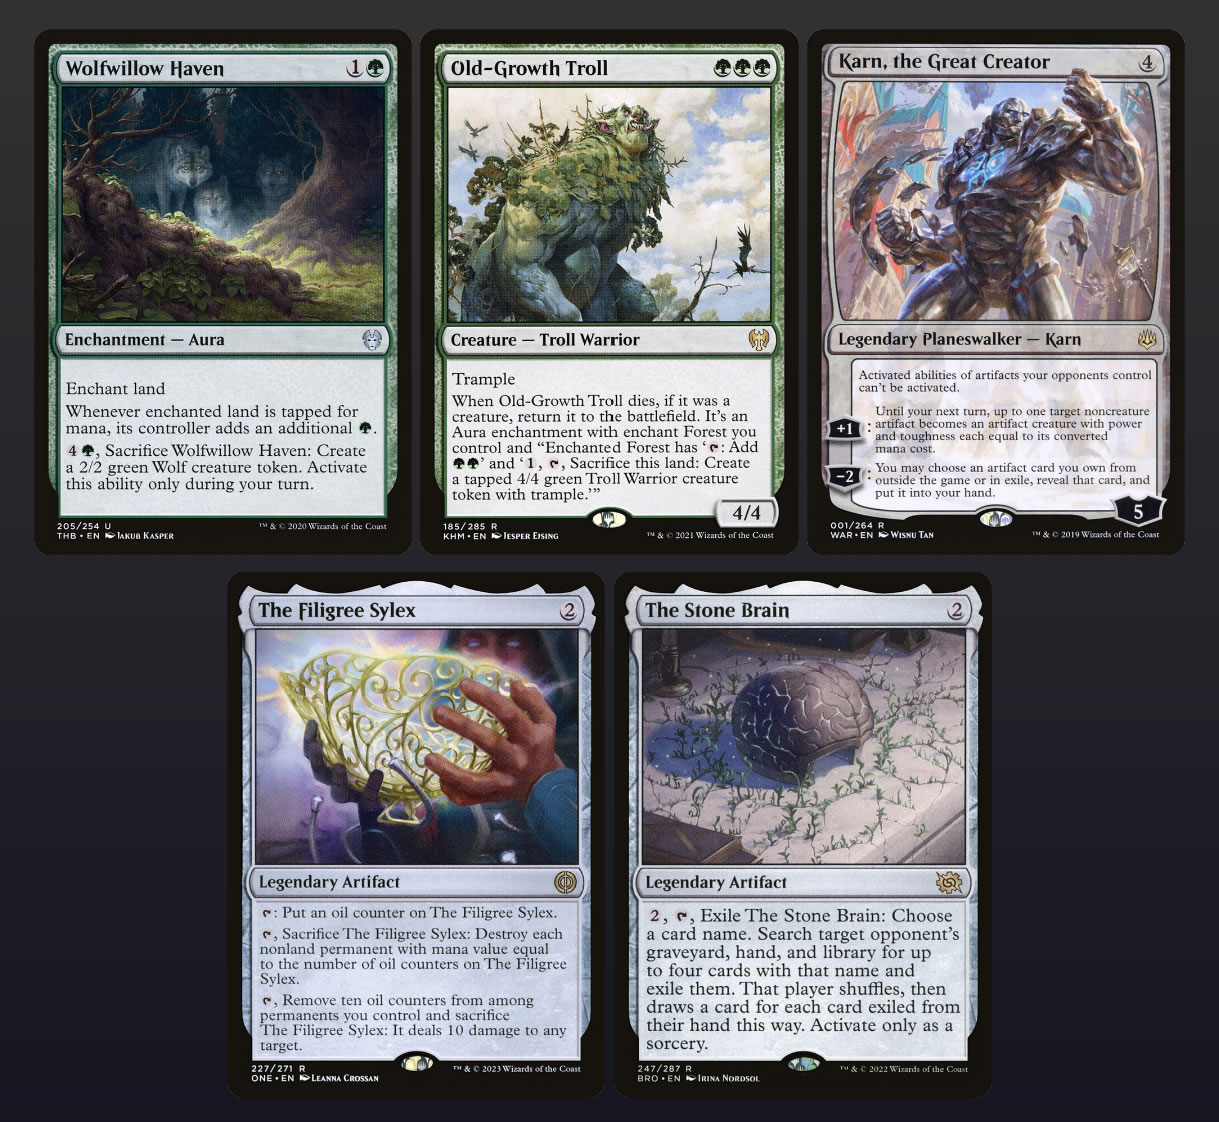
The difficulty of the MonoG matchup largely comes down to the starting hands: you want something that can kill an elf, especially on the draw, but also something that can kill the player in case there are no elves in play (like Haven into Karn, or even a turn 3 Troll as the first play), which can be surprisingly problematic if you focus too much on reacting. MonoG doesn't interact well, but it has a lot of gas under the hood.
The Stone Brain, through Karn, is the key card in the matchup. Against the rare lists with more than one copy, capable of bringing them in post-sideboard, the Wyrm + Shrimp plan doesn't work too badly and allows you to handle the first activation. Shrimp itself doesn't need much support to kill planeswalkers and then the player... However, I would prioritize the Wyrm because, after having to interact turn after turn, you don't always have the minimum number of spells.
Mystical Dispute is primarily justified by Kiora, but also complicates MonoG's calculations in addition to Spell Pierce and Make Disappear.
Initially, I wanted to cut all the Fables on the draw, but given the importance of going into combo at some point, this configuration left too few enablers. The conclusion seems to be to consider Fable as a turn 3 on the play and a turn 5 on the draw, except in ideal cases where you have perfectly interacted beforehand.
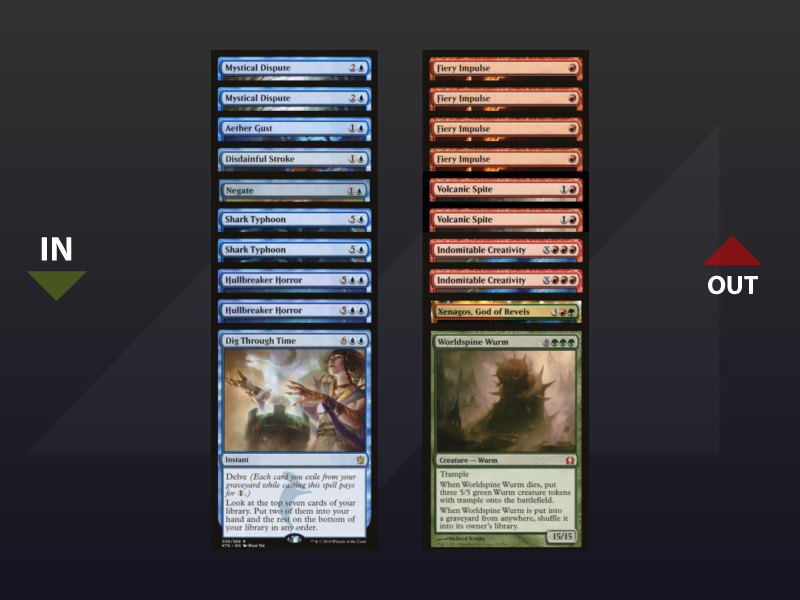
Creativity (all variants, 50/50)
Key cards
Sideboarding

Walkthrough
The balance of blue match-ups can be deceptive because, compared to others, they are much longer and more technical, giving a significant edge to those who can master them. Some aspects of the lineup, such as the second Brotherhood's End replacing a Shark Typhoon, have been designed with this in mind: if you're not comfortable with draw-go games, consider beefing up your sideboard.
As in any match-up of this nature, you should avoid tapping out unless you have no choice, either because you're missing land drops or because a threat is looming. This can greatly impact sided games, putting even more pressure on missed land drops and the slightest treasure generation. Divide by Zero, later flashed back by Gearhulk, and Otawara can punish you for playing Horror every turn without regard for tempo, so be careful not to lock yourself into this play pattern: it's best to start playing Horror with some mana up.
Fable of the Mirror-Breaker lives up to its name in this context. It's an effective way to check counterspells in the mid-game, apply pressure to avoid falling behind in the dance of Shrimps, or overpower the Mirrex plan.
Rakdos Sacrifice (~ 62,5 / 37,5)
Key Cards

On the Draw
On the Play

Walkthrough
The Rakdos Sacrifice matchup feels like a simpler version of Rakdos Midrange, as the deck clocks in slower and disrupts us less. The main difference lies in the vulnerability of our Fables in game one, where both sides are susceptible to removal, as well as Mayhem Devil's pings and occasional blowouts from Claim the Firstborn. It might be wise to slow-roll Fable to hinder the Sacrifice game plan when we have ways to interact with early threats. Once again, we have more time and resources than in the Midrange matchup to assemble the combo safely.
After sideboarding, Ob Nixilis encourages us to eliminate early drops on sight, especially Bloodtithe Harvester, whose three power takes the planeswalker out of Brotherhood's End range. Playing Xenagos is a possibility, but we'll face Furnace Reins on the Hydra at the same (low) frequency as Extinction Event. My argument for keeping it in the deck is that the extra time allows us a more deterministic kill.
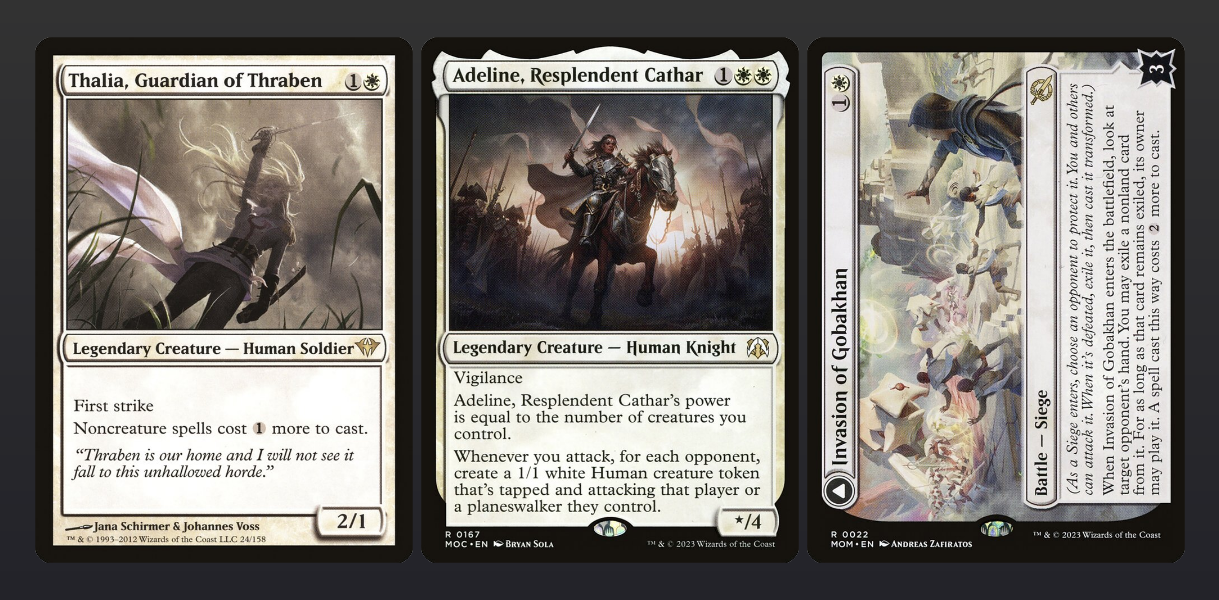
MonoWhite Aggro (~ 40 / 60)
Key cards
On the Draw
On the Play
Walkthrough
The numerous taxing and protection effects, the go-wide strategy against our lack of blockers, and Adeline's resilience to almost all of our removal spells make this matchup particularly challenging when on the draw. That said, MonoW struggles to interact with the combo itself, so surviving for five turns might be enough. Initially, I was drawn to Hullbreaker Horror, but it struggles against wide boards and is vulnerable to Giant Killer/Destroy Evil. Invasion of Gobakhan punishes Shark Typhoon (and sometimes Wurm in hand, such is life...). We trim Big Score and Impulse due to the lack of time to resolve them under pressure, but a minimum of these cards is necessary to assemble the combo before losing.
Boros Convoke (~ 45 / 55)

A very similar match-up in which we bring in the same cards, so I'm addressing it in the same manner. Don't hesitate to use your removals on lesser threats, as they can be seen as mana dorks. The deck is more inconsistent and not much more resilient than MonoW, which logically increases our win percentage.
Spirits (~ 60 / 40)
Key cards
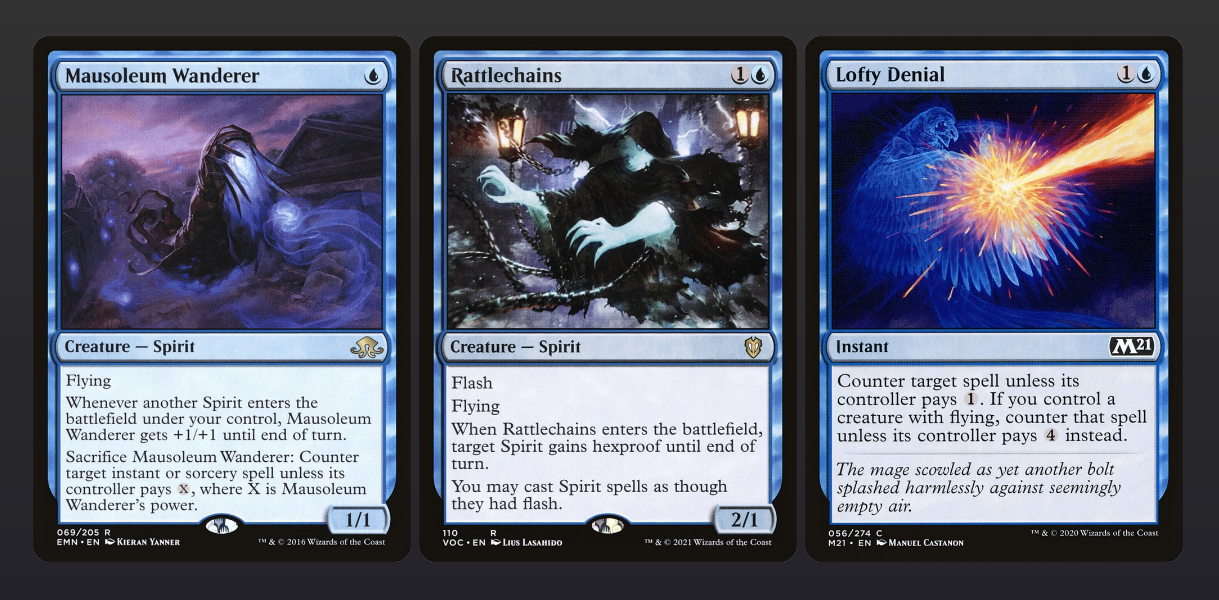
Sideboard Plan
Walkthrough
Spirits is a subpar deck that attempts to make up for the weakness of its creatures and the conditional nature of its responses by positioning well against heavier decks. This strategy works against in game one; afterwards, not at all. My evaluation would be more favorable if we hadn't cut down to two Shark Typhoons. This card is the best in the matchup, but Rending Volley and Mystical Dispute are close behind. Regardless, we prefer to spend the early turns interacting and only create the first shark as a 3/3 or 4/4 that can assuredly eat an attacker.
In G1, before we can execute this fantastic switch, we rely on Fable of the Mirror-Breaker and the few windows of opportunity for Big Score to try to resolve the combo while paying for the counterspells. Fable itself excels against this ridiculously ill-equipped deck when it comes to dealing with a Goblin Shaman.
The main danger in the matchup is getting caught in Rattlechains, so we must avoid doing so at all costs as long as we’re not losing to it anyway.
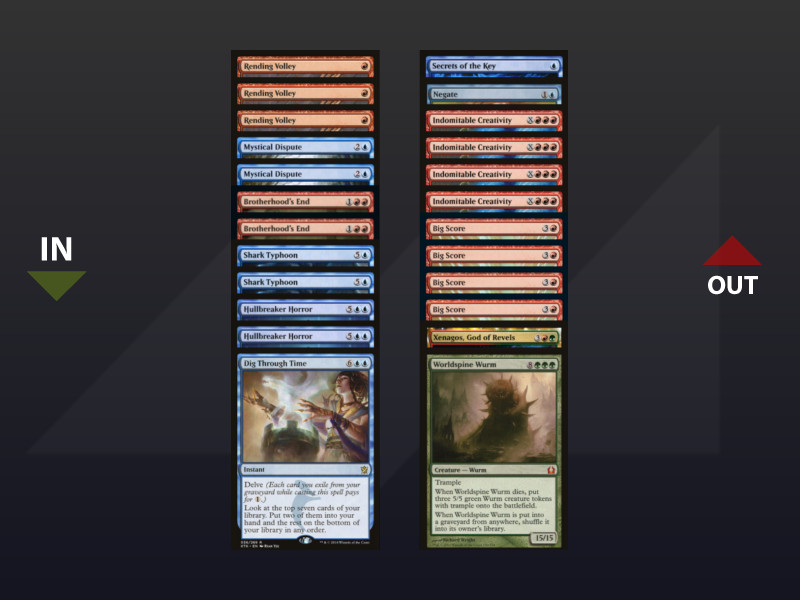
Lotus (~ 45 / 55)
Key Cards

Sideboard Plan

Additional Choices
Remove the combo to add Hullbreaker
Out:
-1 Xenagos, God of Revels
-1 Worldspine Wurm
In:
+2 Hullbreaker Horror
Walkthrough
The race against Lotus is a race for mana. It's crucial to counter Sylvan Scrying and other enablers in general to delay the inevitable combo turn through our soft counters. Sometimes, in accordance with Lotus's law, the opponent gets stuck on their own and a huge Wurm crushes them.
Even more so than MonoGreen, this match-up raises the question of securing the kill and requires being prepared to switch strategies to avoid being too predictable. In the main deck, if Lotus only has Boseiju and Otawara for interaction, it can still consistently kill on the crack-back, making any interaction potentially fatal. We'd like to switch to a Flash plan and a less mana-intensive combo, but cards like Dragonlord Dromoka and Narset's Reversal heavily punish control attempts. Ultimately, the best approach is to adjust (and, if necessary, pretend to sideboard).
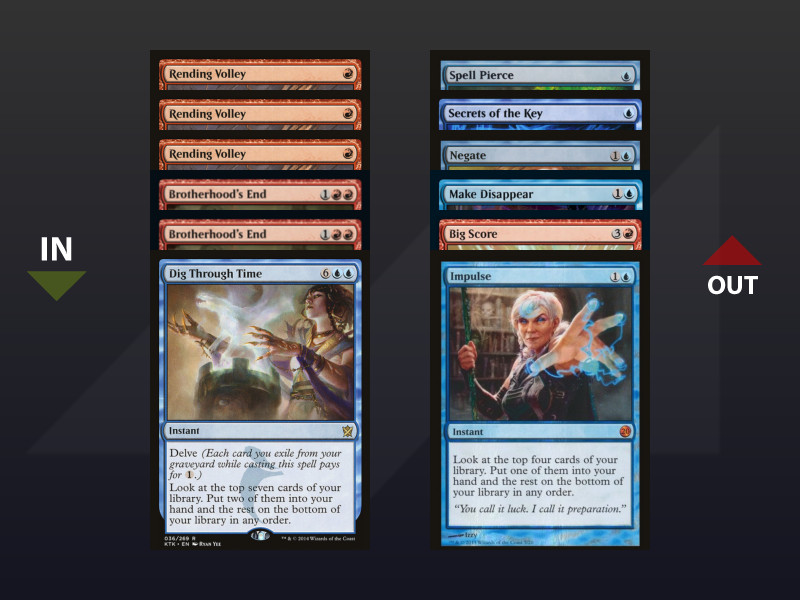
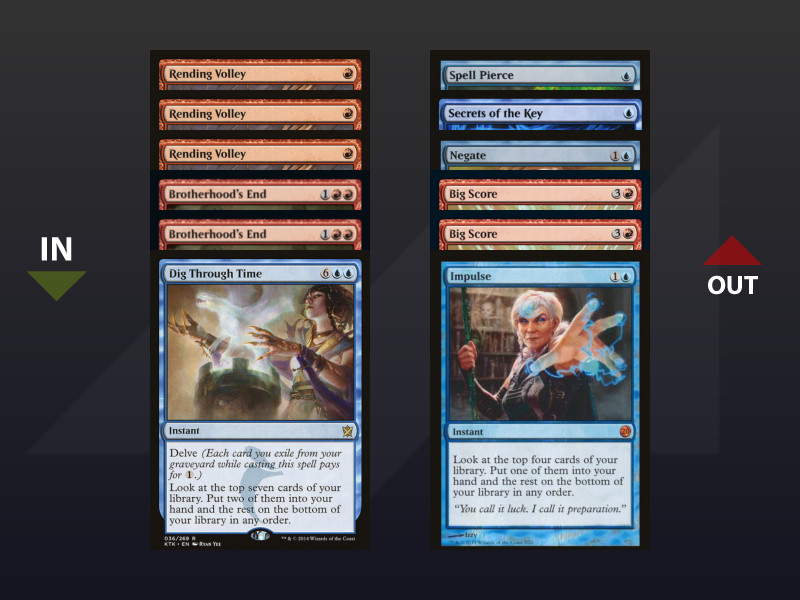
Greasefang (~ 60 / 40)
Key Cards

On the Draw
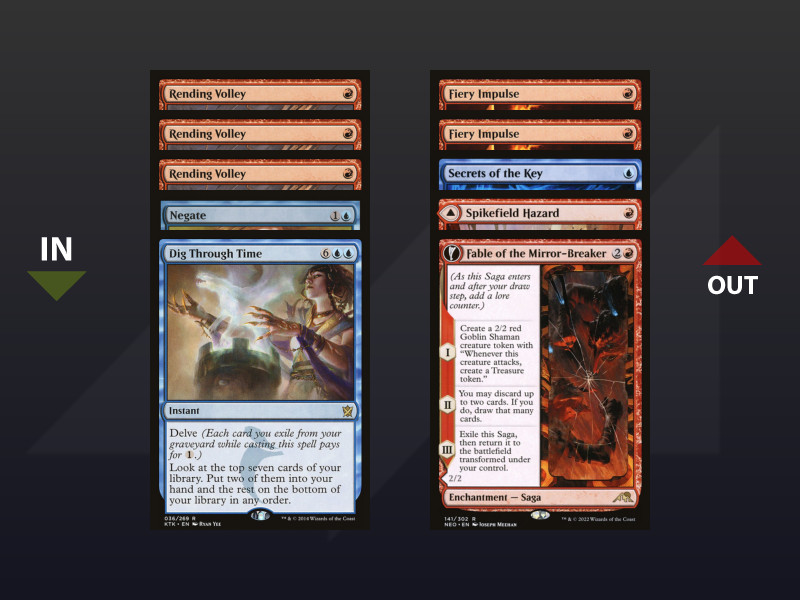
On the Play

Walkthrough
Another variant of the Rakdos match-up where the opponent decided to bet everything on the survival of an X/3, which is not to displease us. Be careful, though, that Fiery Impulse is insufficient on turn 3 without the help of selective discard. A creative teammate started testing the match-up without including Rending Volley: please include yours. To lose to Chariot, you really have to do it on purpose.
UW Control (~ 37,5 / 62,5)
Key cards
Sideboard Plan
Walkthrough
In theory, this matchup can be quite challenging, even very difficult in the main deck, but there are opportunities to break through if you're opportunistic. Specifically, there are three ways to steal Game 1:
- Force an early Fable (no counter)
- Abusing Mirrex (no Field of Ruin)
- Resolve the combo boldly in a chosen spot (no counter, but later).
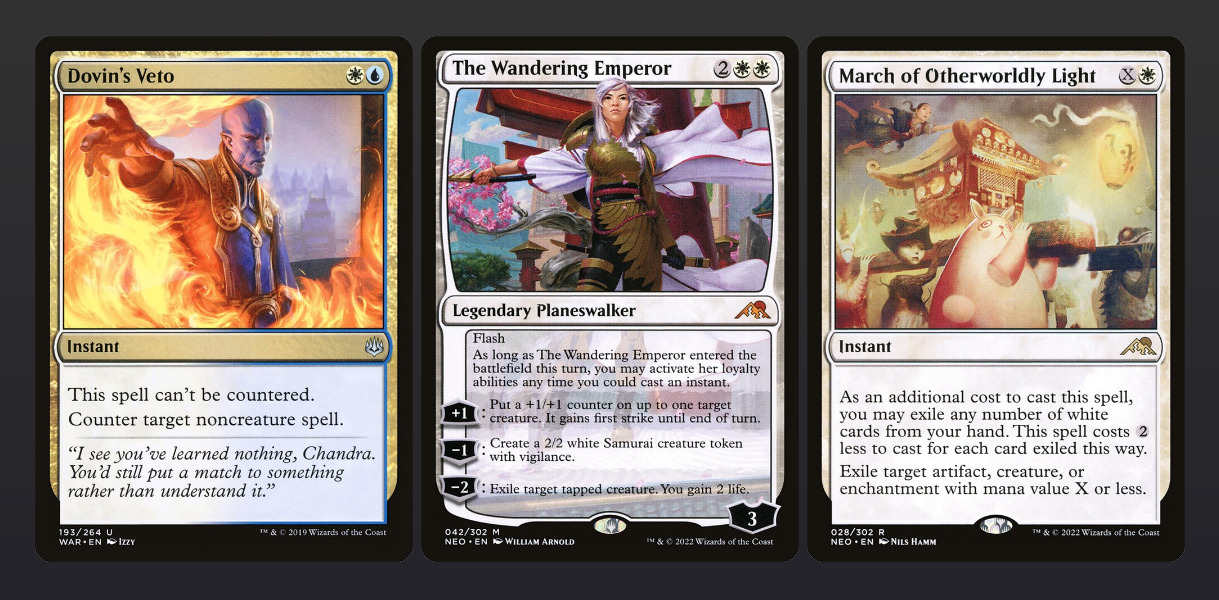
Each of these scenarios is unlikely on its own, but their coexistence strengthens them, as the control player must take measures to eliminate them all simultaneously. Often, a Memory Deluge, a Wandering Emperor, or a panicked Field of Ruin activation allows you to resolve a Big Score, paving the way for Creativity with some backup. The key is to not assume the opponent always has a loaded hand.
The three cards shown above pose particular problems. Veto ends counter battles, and there's not much you can do about it except sigh. More interestingly, The Wandering Emperor may tempt you to pass the turn once the combo is assembled if, and only if, you have the means to counter it (or a Teferi that could tuck the Wyrm). Lastly, March of the Otherworldly Light costs only one mana on a token and can lead to annoying bursts of responses. While it's often difficult to avoid in the late game, it's important to be aware of it.
Post-sideboard, similar to the mirror match, Hullbreaker Horror redefines the dynamic, and it's even more crucial to cast it with mana up to dodge Fateful Absence or a big White March. Our list, not really tailored for the matchup, must keep three removals, either a split of Volcanic Spites and Rending Volleys, to be determined based on the presence of Narset, Chrome Host Seedshark, or (in Kaheera versions) Brimaz.
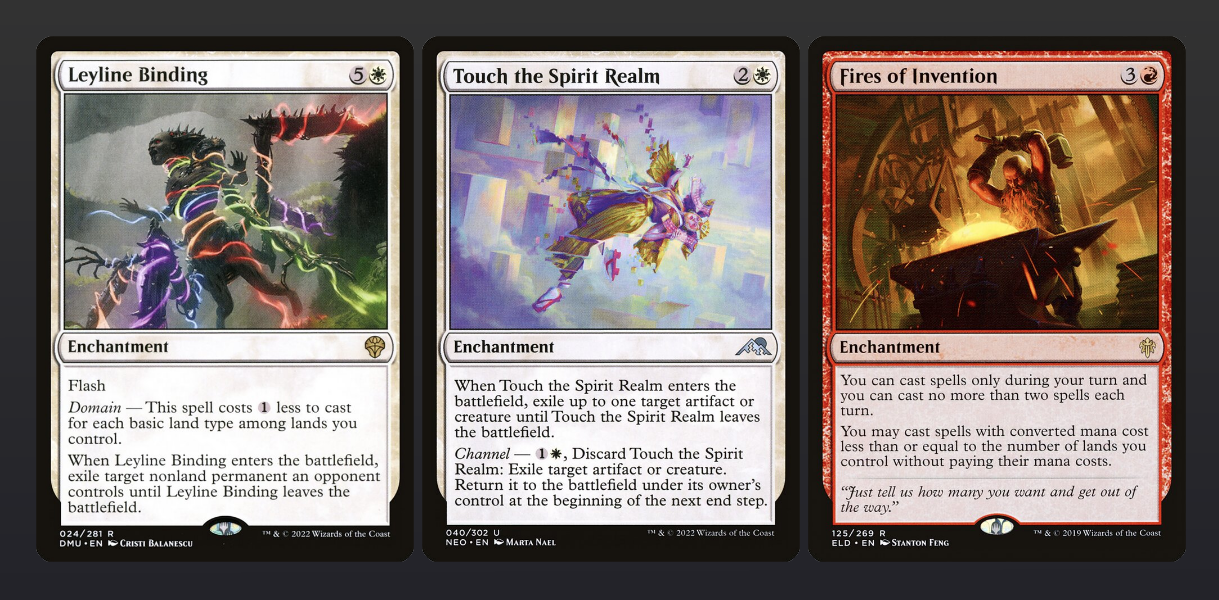
Enigmatic Fires (~ 60 / 40)
Key Cards
Sideboard Plan
Walkthrough
Like Spirits, this deck can be quite deceptive, as it appears to have strong answers to the main deck combo. However, this illusion is shattered when the sideboard reveals its inability to play the flash game effectively.
From game one, careful piloting can give you an edge, either by waiting to attempt the combo until you have 2+ counters as backup for Bindings (ideally including Negate) or by relying on a Mirrex or Fable. Mirrex has an impressive kill rate against Fires, as they struggle to assemble any kind of board while protecting themselves from the combo. Fable, besides applying pressure, can also copy the Wurm once flipped for a second wave post-Leyline Binding. Overall, the main threat comes from Binding, which can indefinitely handle the Wurm, while Touch the Spirit Realm only slows it down.
Some bullets can put you in a tough spot if you let Enigmatic Incarnation resolve: Kenrith, which threatens to gain too many life points; Koma, which can take down the Wurm; and in some builds, Kotose targeting Indomitable Creativity. All these are reasons not to leave any openings.
The case of Fires of Invention is interesting. One might think that its resolution would be advantageous since it prevents interaction via Binding, but in reality, a skilled player would only cast it 1) out of desperation (in which case you should notice it) or 2) with backup, in the form of a Channel-land or Touch. In the second scenario, allowing Fires to resolve may cause the game to snowball out of control, so I would tend to counter it just to be safe.
The primary objective of post-sideboard Volcanic Spites is to avoid losing to a simple Bonecrusher Giant beatdown.
Omnath to Light (~ 52,5 / 47,5)
Key Cards
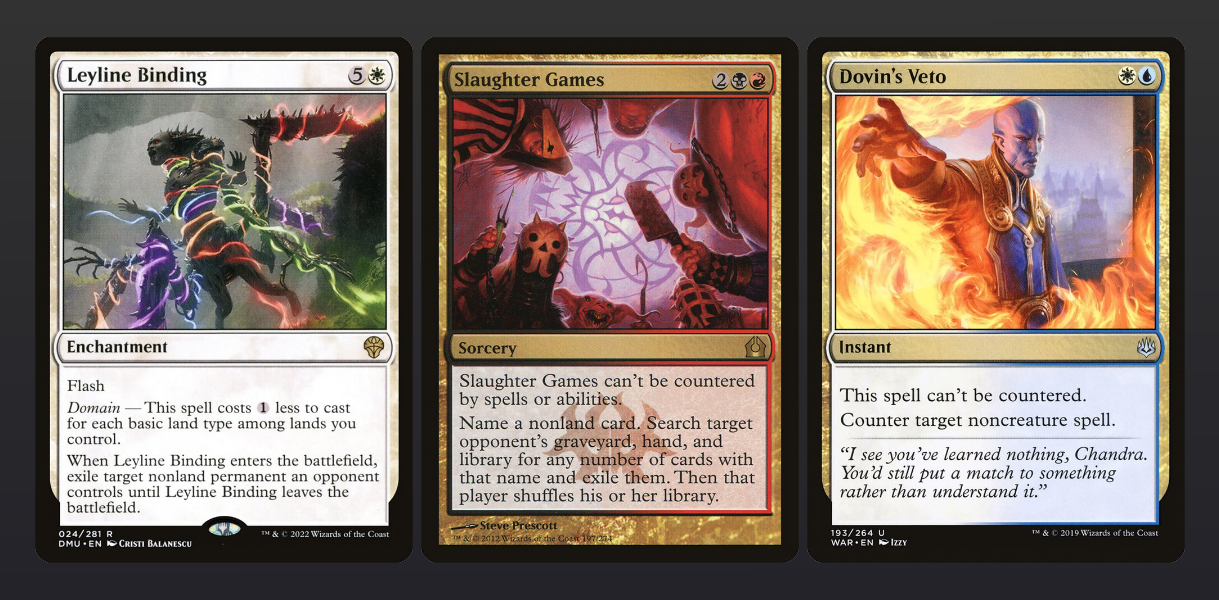
Sideboard Plan
Walkthrough
The older sibling of Fires, featuring more tailored answers and a superior curve. The percentage is theoretical, as I haven't tested against it; it's possible that Slaughter Games, Dovin's Veto, and the pressure from Reckoner Bankbuster post-sideboard might bring us below the 50% mark. Nonetheless, it remains a deck that heavily relies on sorcery speed and greatly depends on Binding for interaction.
Phœnix (~ 57,5 / 42,5)
Key Cards
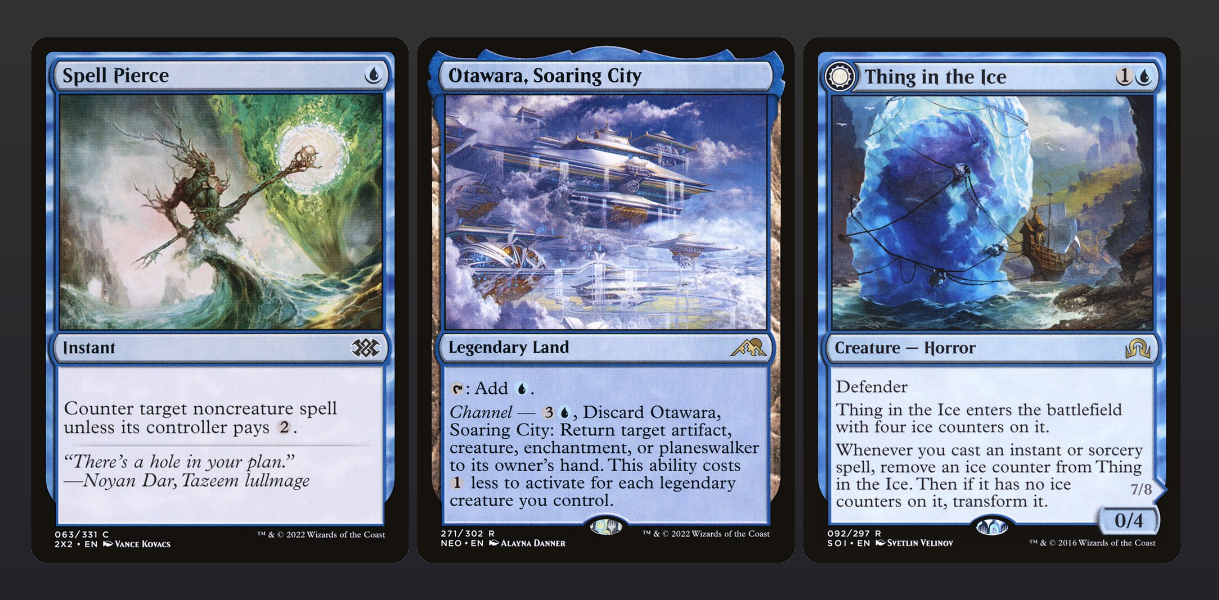
Sideboard Plan
Walkthrough
A highly technical matchup, as expected between the two most elegant decks in the format, that often goes to the better player (though more often to Creativity). What's essential to understand is that extreme caution is required on both sides to prevent combos from assembling. Phoenix aims to find targets for its removals to bring back the namesake card and gain initiative; alternatively, it tries to get a 2/4 Ledger Shredder in play. Creativity seeks to have the mana to break through Spell Pierce, with Otawara creating an additional obstacle as both players face off.
Due to this dynamic, Fable of the Mirror-Breaker, usually dominant in blue mirrors, is one of the worst cards in Game 1, and players must restrain themselves from slamming it down too soon. Unusually, the Thing in the Ice version (4 instead of Shredders) is superior in this matchup, as flipping into Awoken Horror provides a good way to interact with the combo. On Creativity's side, Things are costly to kill with Impulses and Spites, so a more effective strategy is to wait for them to flip naturally, withstand Phoenix's big turn, and go off right after. If their controller also waits, Fable can force the action... Honestly, I’m not sure about how an optimally played Game 1 goes against this version.
Post-sideboarding on the play, the craftiest players might bring in Young Pyromancer, but I think with Gust and Spikefield Hazard, this list's coverage remains sufficient. It's a bit like the Bonecrusher Giants of Fires: sometimes, you'll see one without the answer in hand and look foolish, but the cards that handle them are too weak the rest of the time, so it's a small risk to take.
Storm Herald (lol)
Key Card
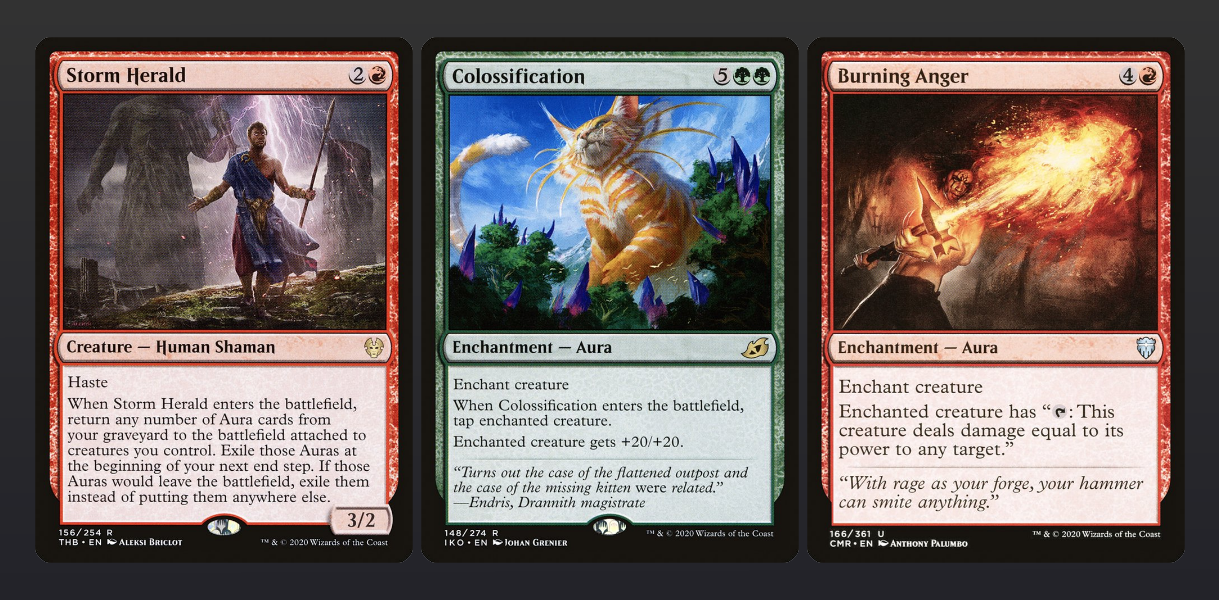
Sideboard Plan

Walkthrough
In our sideboard, there's a small section modestly titled "Tobiasch," created after their impressive 9-0 performance on Day 1. Raphael from our team faced them three rounds later and successfully applied the strategy, which I can't resist sharing with you.
Our theorycrafting led us to the idea that Storm Herald is quite resilient to interaction, thanks to the ability to stack auras on any random creature without targeting it. However, it struggles to interact well itself and can take time to develop. Horror does the job just as effectively as the Wurm combo and requires less setup, knowing that they’re also bringing in counterspells to slow us down. Overall, we rely on our own counterspells and our opponent's fail rate to succeed.
Final Chapter
Well, that's it for me (what a vast format this is!).
I had a great time testing Creativity Wurm for this tournament, almost as much as piloting it on the big day, and I probably would have made it to day 2 if I hadn't let my guard down during several critical rounds.
All Pioneer decks have weaknesses, a flaw that comes with the diversity of the format, and this one is no exception: Otawara, go-wide strategies, Bankbuster, Sheoldred... However, in Magic, we play the numbers, and I can't understand why it isn't more popular. I hadn't settled on a deck this early in testing for years, and considering my love for Phoenix, that's saying something. I suspect that, as often happens, the sacred Innovation takes up too much space, that we get stuck on the idea that an "old" deck can’t be the solution to a format, and that, moreover, people have a hard time accepting losing to a simple Otawara... A fate that, by the way, if you've read the article, should no longer seem so inevitable to you.
In the elegant continuity of the Charging Monstrosaur and the Haughty Djinn, may the Good Old Wurm guide your steps.
J-E Depraz